

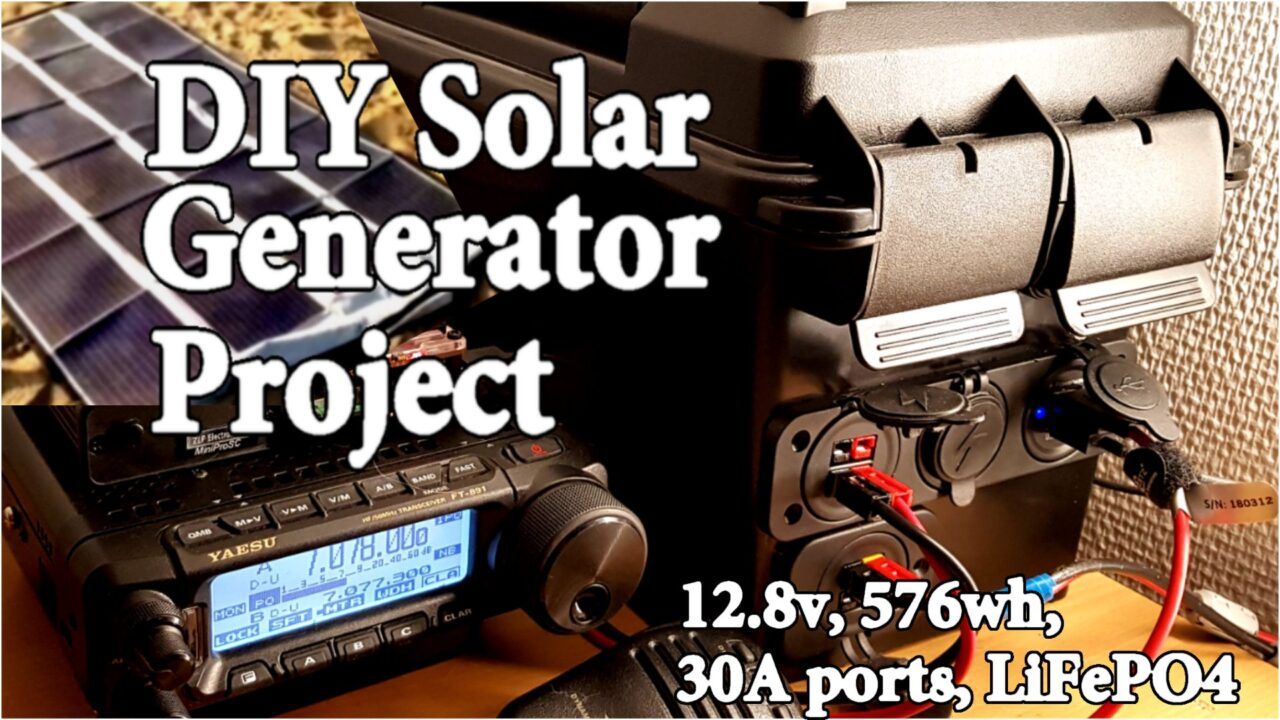
Hello OperatorsFrom December 2018 through February 2019, I researched, designed, documented, and built a 12 volt, 576wh DC Solar Generator, using LiFePO4 batteries. In some ways, this solar generator will be a radical departure from traditional diy battery boxes found previously on YouTube, and in the amateur radio community.
Main features
- 576 watt hours, 45amp hours
- 30A ports
- 2x USB ports
- 2000 cycle service life (minimum)
- Internal Bluetooth battery monitor
- 4x DC Powerpole ports
- Every port is individually fused
- MPPT charge controller
- Dual Solar inputs
- Total weight 18lbs (8.3kg)
- Easy maintenance
- Replaceable Components
- Easy to build
Cost vs Goal Zero Yeti 400 (LiFePO4/Lithium/Lead-acid)
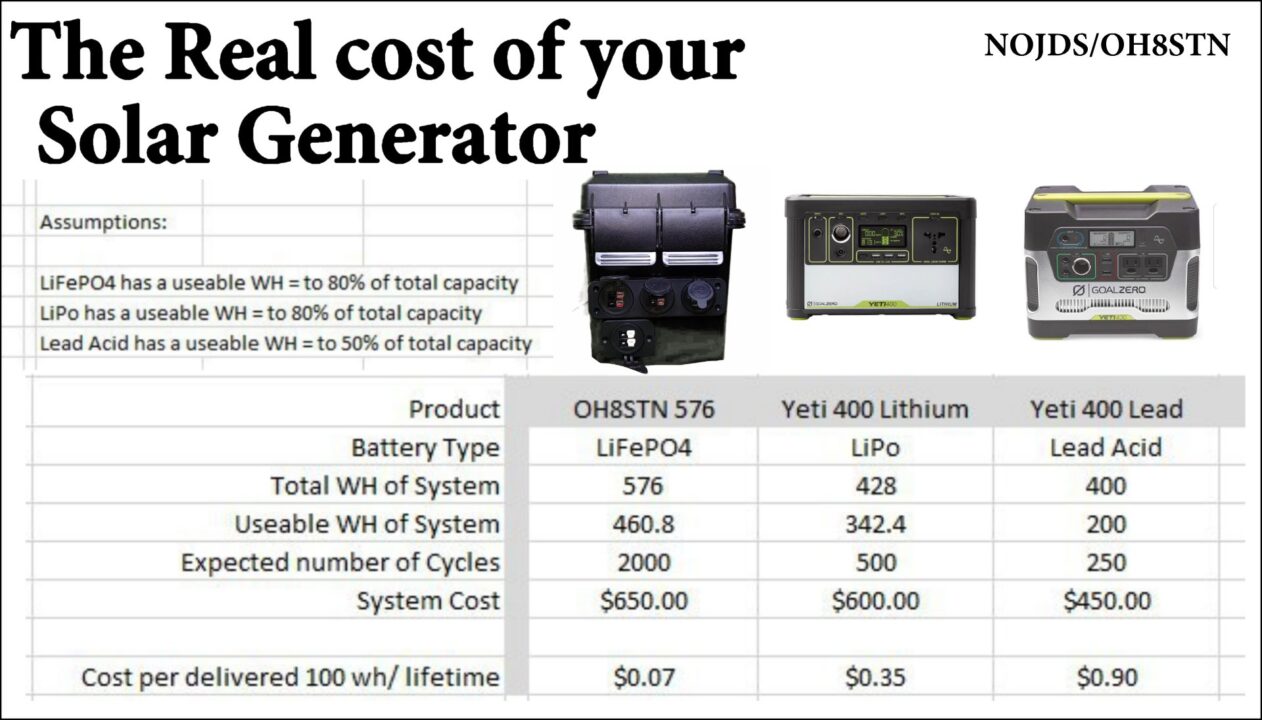
This comparison is based on the the result of the following calculation:
- (Total System Cost / Total Delivered WH of system for it’s expected lifetime) * 100 Watt Hours
- The Total Delivered WH over the expected lifetime is calculated by (useable WH rating of the pack * the expected number of cycles)
This gives us an objective metric to compare the actual cost for every delivered 100 watt hours of energy for any given solar generator system or battery pack.
There is no cost factored in for solar panels or any other means of recharging the pack. This formula seeks to isolate the actual cost of delivered WH of a pack regardless of the source of charging energy.
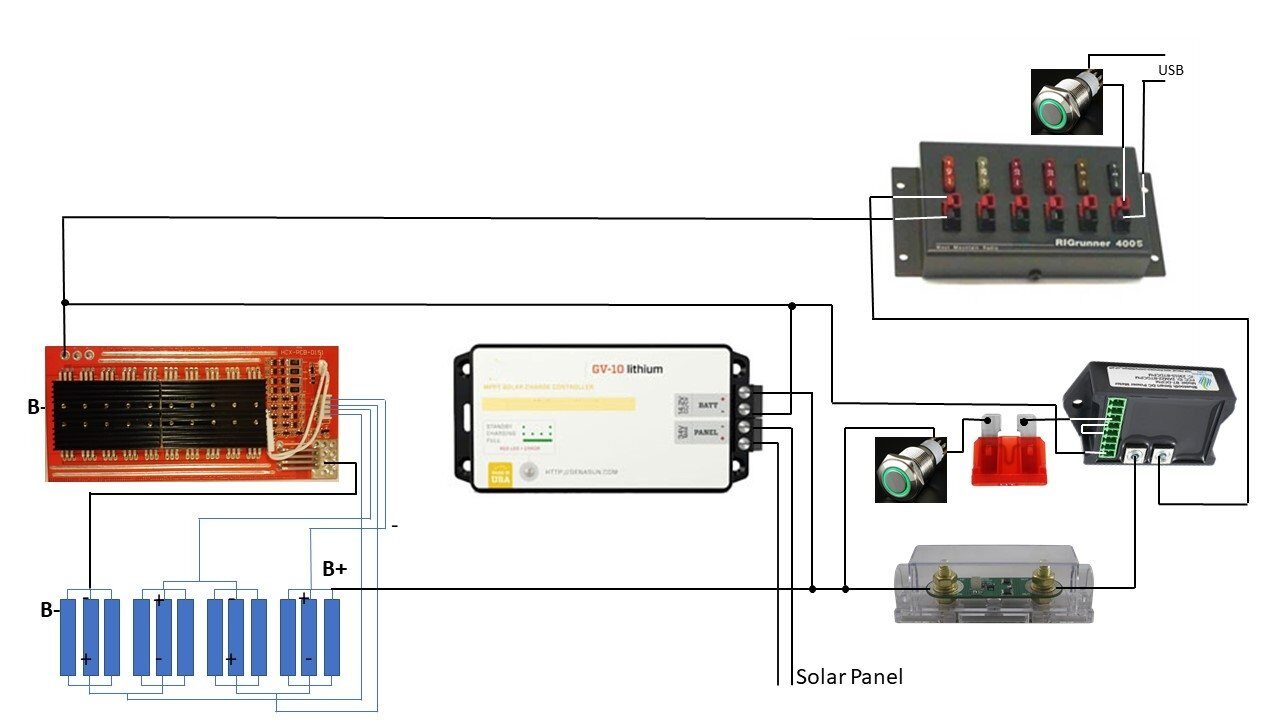
The DIY Solar Generator
Parts List:
Before moving forward with this project, It is important to know, this parts list is not fixed! The project is a concept which can be adapted to your own needs and parts availability. As time goes on, it is inevitable parts availability may become an issue. In this case, you’ll have to find substitute parts meeting the same specs and functionality. I’ll do my best to keep updating this post, but ultimately parts sourcing for the project is up to you!
- Battery Modules:
The project started with Headway LiFePO4 Cells. At the moment these may be difficult to get new from China: I am currently recommending Battery Hookup which ships globally. Battery Hookup has prismatic and headway cells, both compatible with this project. Use code oh8stn for a 5% discount from Battery Hookup.- Headway 10ah cells Battery Hookup Headway (Ships worldwide): https://oh8stn.net/10ahheadway
- Prismatic cells Battery Hookup Headway (Ships worldwide): https://oh8stn.net/4pkPrismatic
- Headway 8ah cells Battery Hookup Headway (Ships worldwide): https://oh8stn.net/8ah_headway
- BMS
The project originally used a Bestech BMS 4S LiFePO4.Forget it! Here are some alternatives: - Enclosure: https://amzn.to/2BGleMV
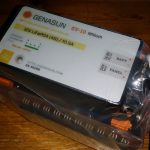
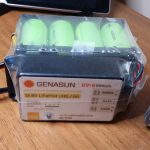
- Genasun MPPT Charge controller: https://oh8stn.net/genasun_gv10l
- Powerpole USB: https://amzn.to/2DPzHqc
- Alt Powerpole USB: https://amzn.to/2XacPKY
- Powerwerx Powerpole POD: https://amzn.to/2V76azr
- 45A Powerpoles: https://amzn.to/2Xad7RT
- Powerwerx Powerpole crimper: https://amzn.to/2X852NA
- Thornwave Bluetooth Shunt: https://amzn.to/2ElUhkH
- K-TOR Generator TBD
All of the parts on this list are affiliate links. These links help the channel to offset costs related to the research, documentation, build and expenses which go in to each project.
Dimensions TBD
- BMS –
- Single Headway 40152s 15ah cells –
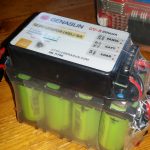
- 4S3P 576wh pack assembled –
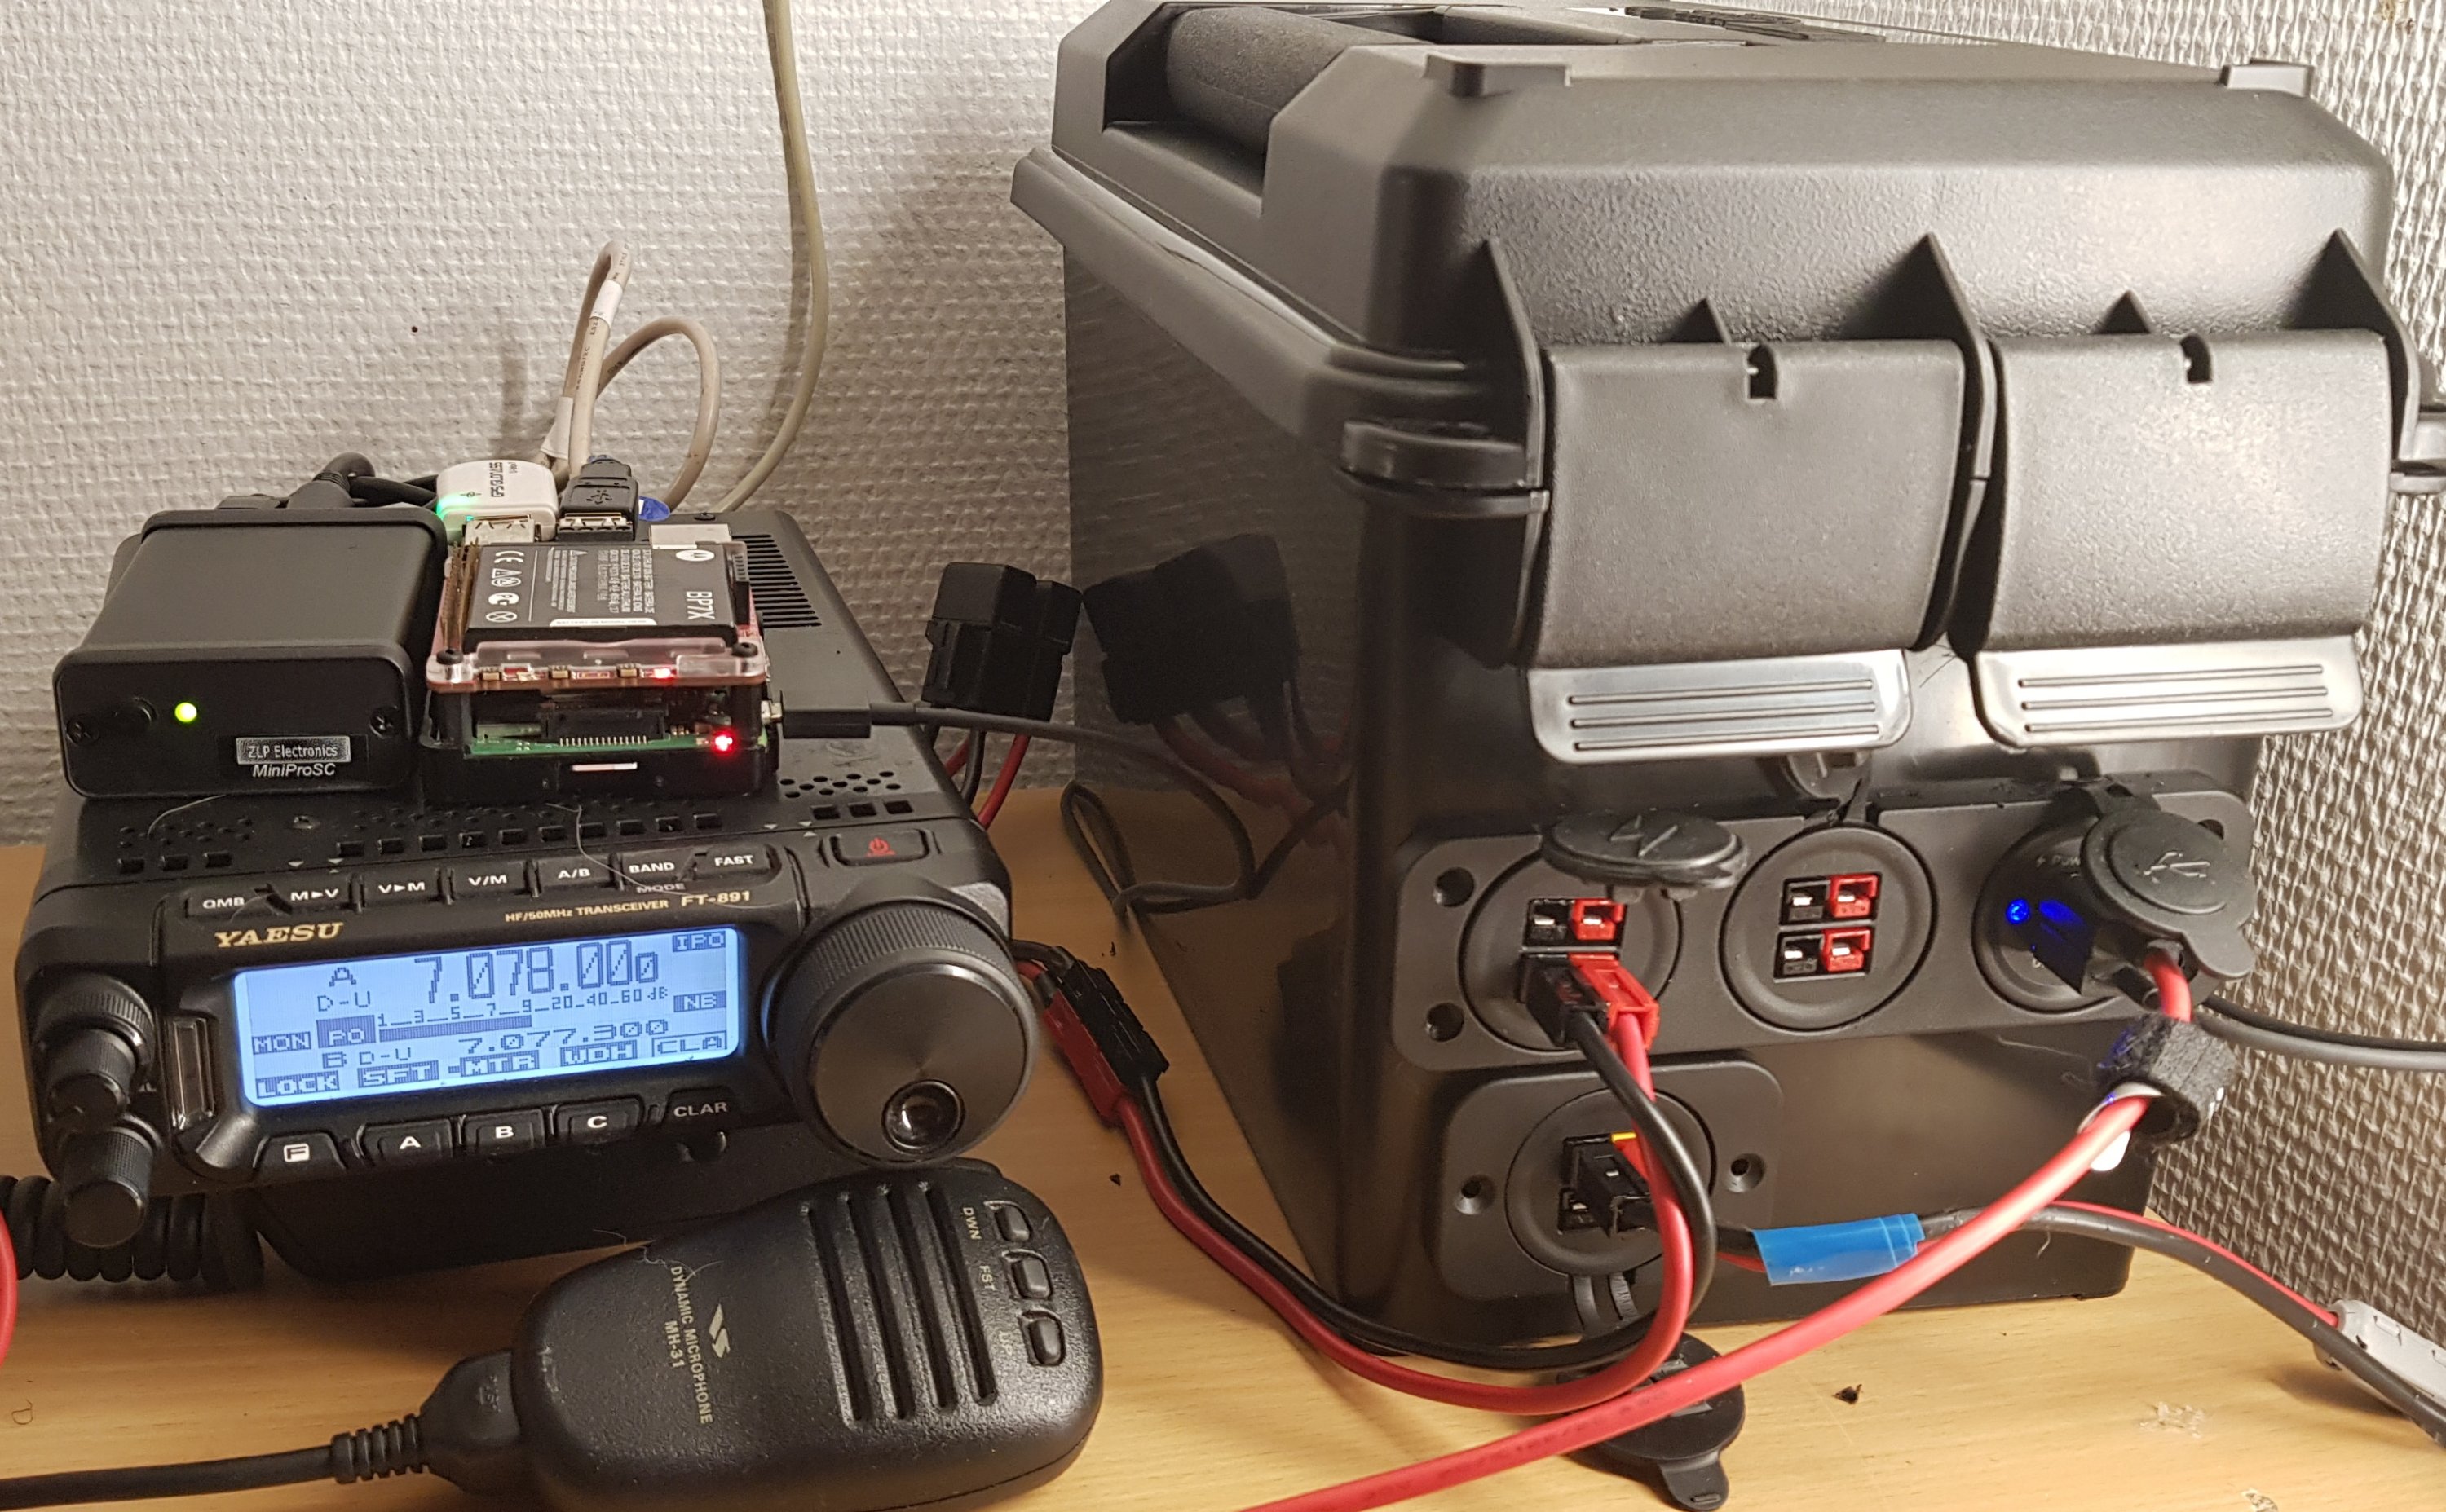
The first video in the DIY Solar Generator Project was the Headway unboxing on the DIY LiFePO4 channel. In this video you can see the cells I’m using for the solar generator build. I also talk a little bit about the project and what it’s all about.As is always the case with my channel and blog, the focus on this solar generator is the balance between capability, portability, and run time.
- It has to be small enough to carry
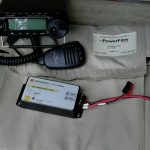
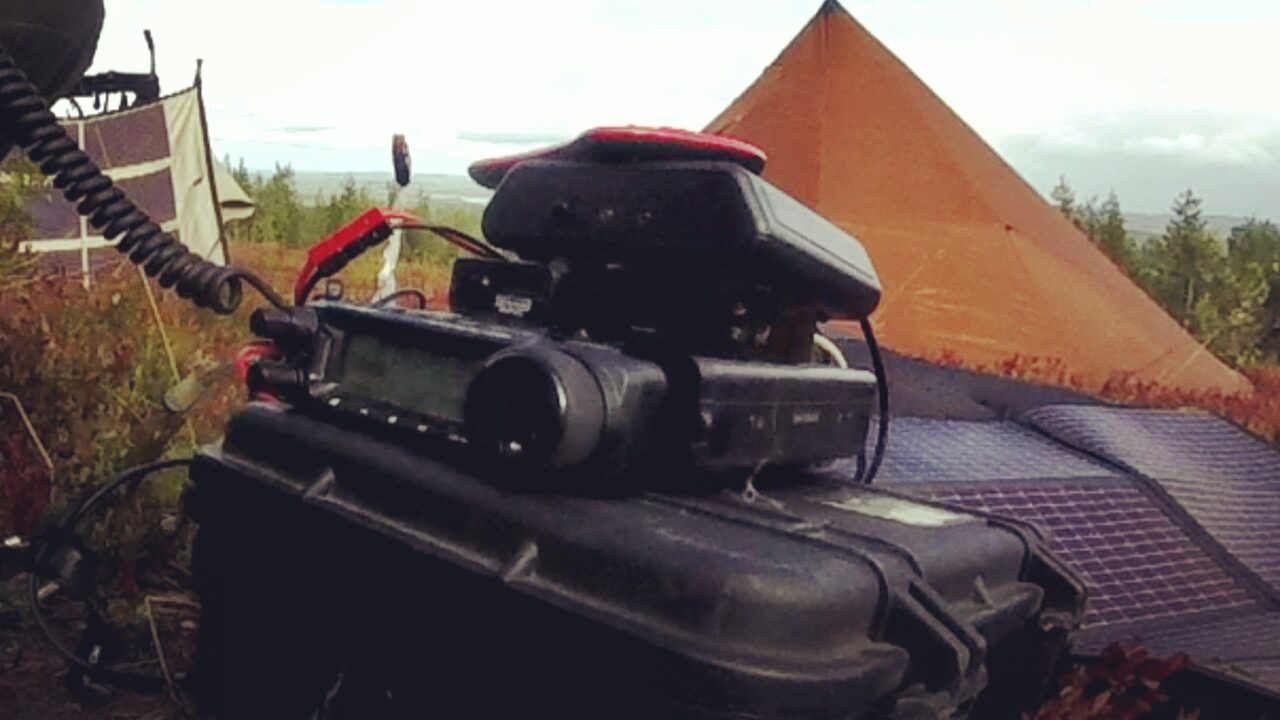
- It must have enough capacity to provide 24 hours of energy autonomy while providing continuous power for the field station
- It must be compatible with our chosen Yaesu FT-891, Raspberry Pi, and Android Tablet for field communications.
- It needs powerful enough ports to run high power inverters, for a short periods of time during an emergency.
The project will avoid compromises in the quality of the cells, BMS and charge controller, and all ports used are Powerwerx and Anderson Powerpole, (which will hopefully provide a long, trouble free life and return on investment.More features :
- ~45 amp hours or 576 watt hours.
- 60A sustained current draw through the BMS.
- Main power switch
- BMS LVD Reset switch
- Built in digital current shunt to measure current in and current out, estimated time till flat, estimated time till full, current voltage, …
- 4x fused 45A Anderson ports.
- 2 x switched & fused USB ports
- 1x fused/switched high output port for an insane operator with a DC powered field amplifier, or to plug in a Pure Sineway inverter. tbd
- Android app to display current load, voltage, time until flat, time until full, …
- Built into a 30 cal ammo box (hopefully) 😀
If you’ve ever wondered about how long it takes to charge the solar generator, please take a look at this article.
Read about the first bench test
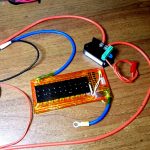
Current shunt
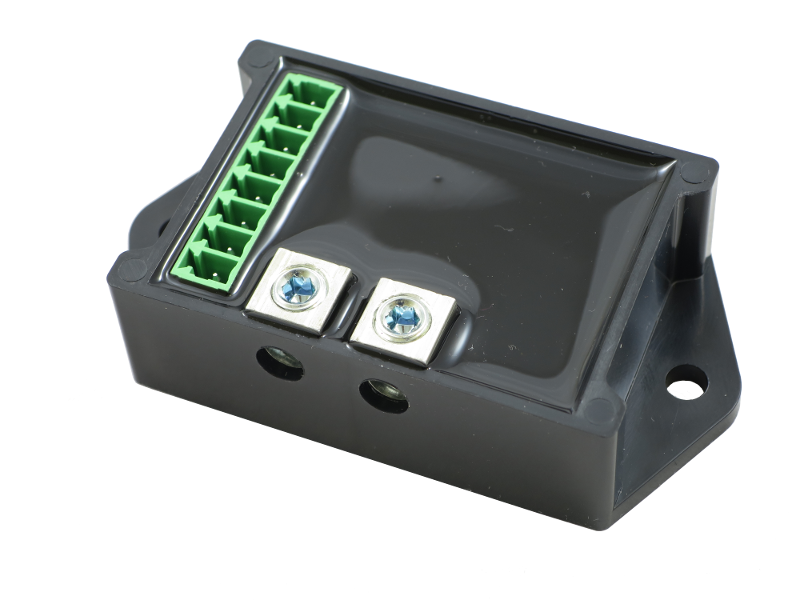
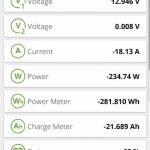


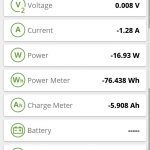
While the wireless current shunt is a radical departure in diy building, the shunt itself is often left out of solar generator or battery box systems. Even commercial solar generators like the Inergy Kodiak lack a current shunt instead, the they rely on cheaper Chinese voltage meters to display numbers ham radio operators understand, but foreign to most other non-technical users.Diy builders add voltage meters as a gauge to understanding the state of the battery. The benefits of using a current shunt over a voltage meter is understanding every aspect of the batteries condition. The Power coming In, the power being used, voltage remaining, voltage coming in from the solar panel, load, runtime, … all displayed on your mobile phone screen.Features & details
- Remotely monitor two DC voltages, current, power, energy (Wh), battery state of charge (in percentage and Ah), and temperature
- Measures voltage up to 60V and current up to 60A using the internal current shunt
- Sense up to 160mV of voltage drop across an external current shunt, allowing 300-600A currents to be measured
- Controls a power relay or SSR (Solid State Relay), low / high voltage disconnect, over-current disconnect, remote ON / OFF
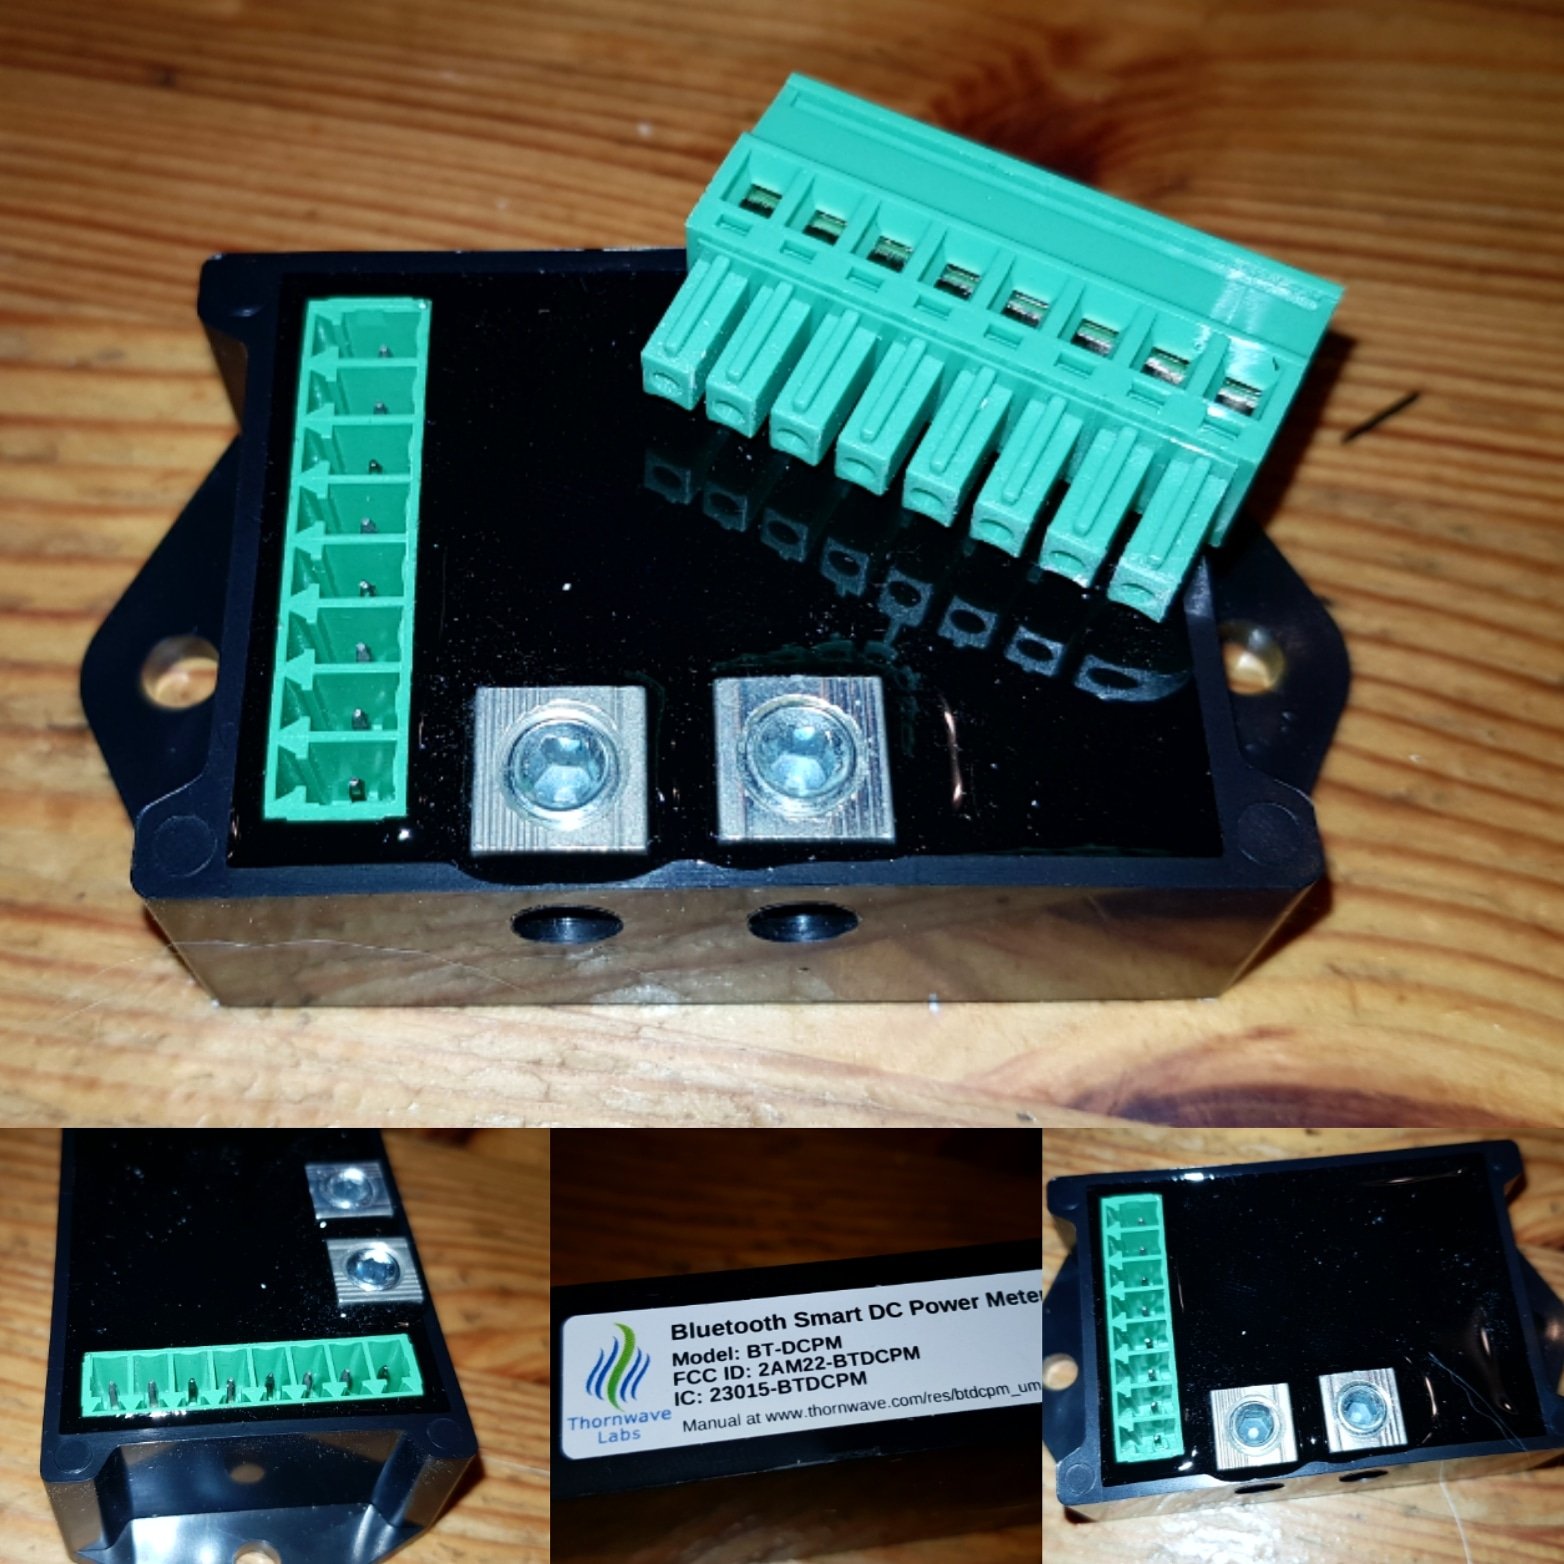
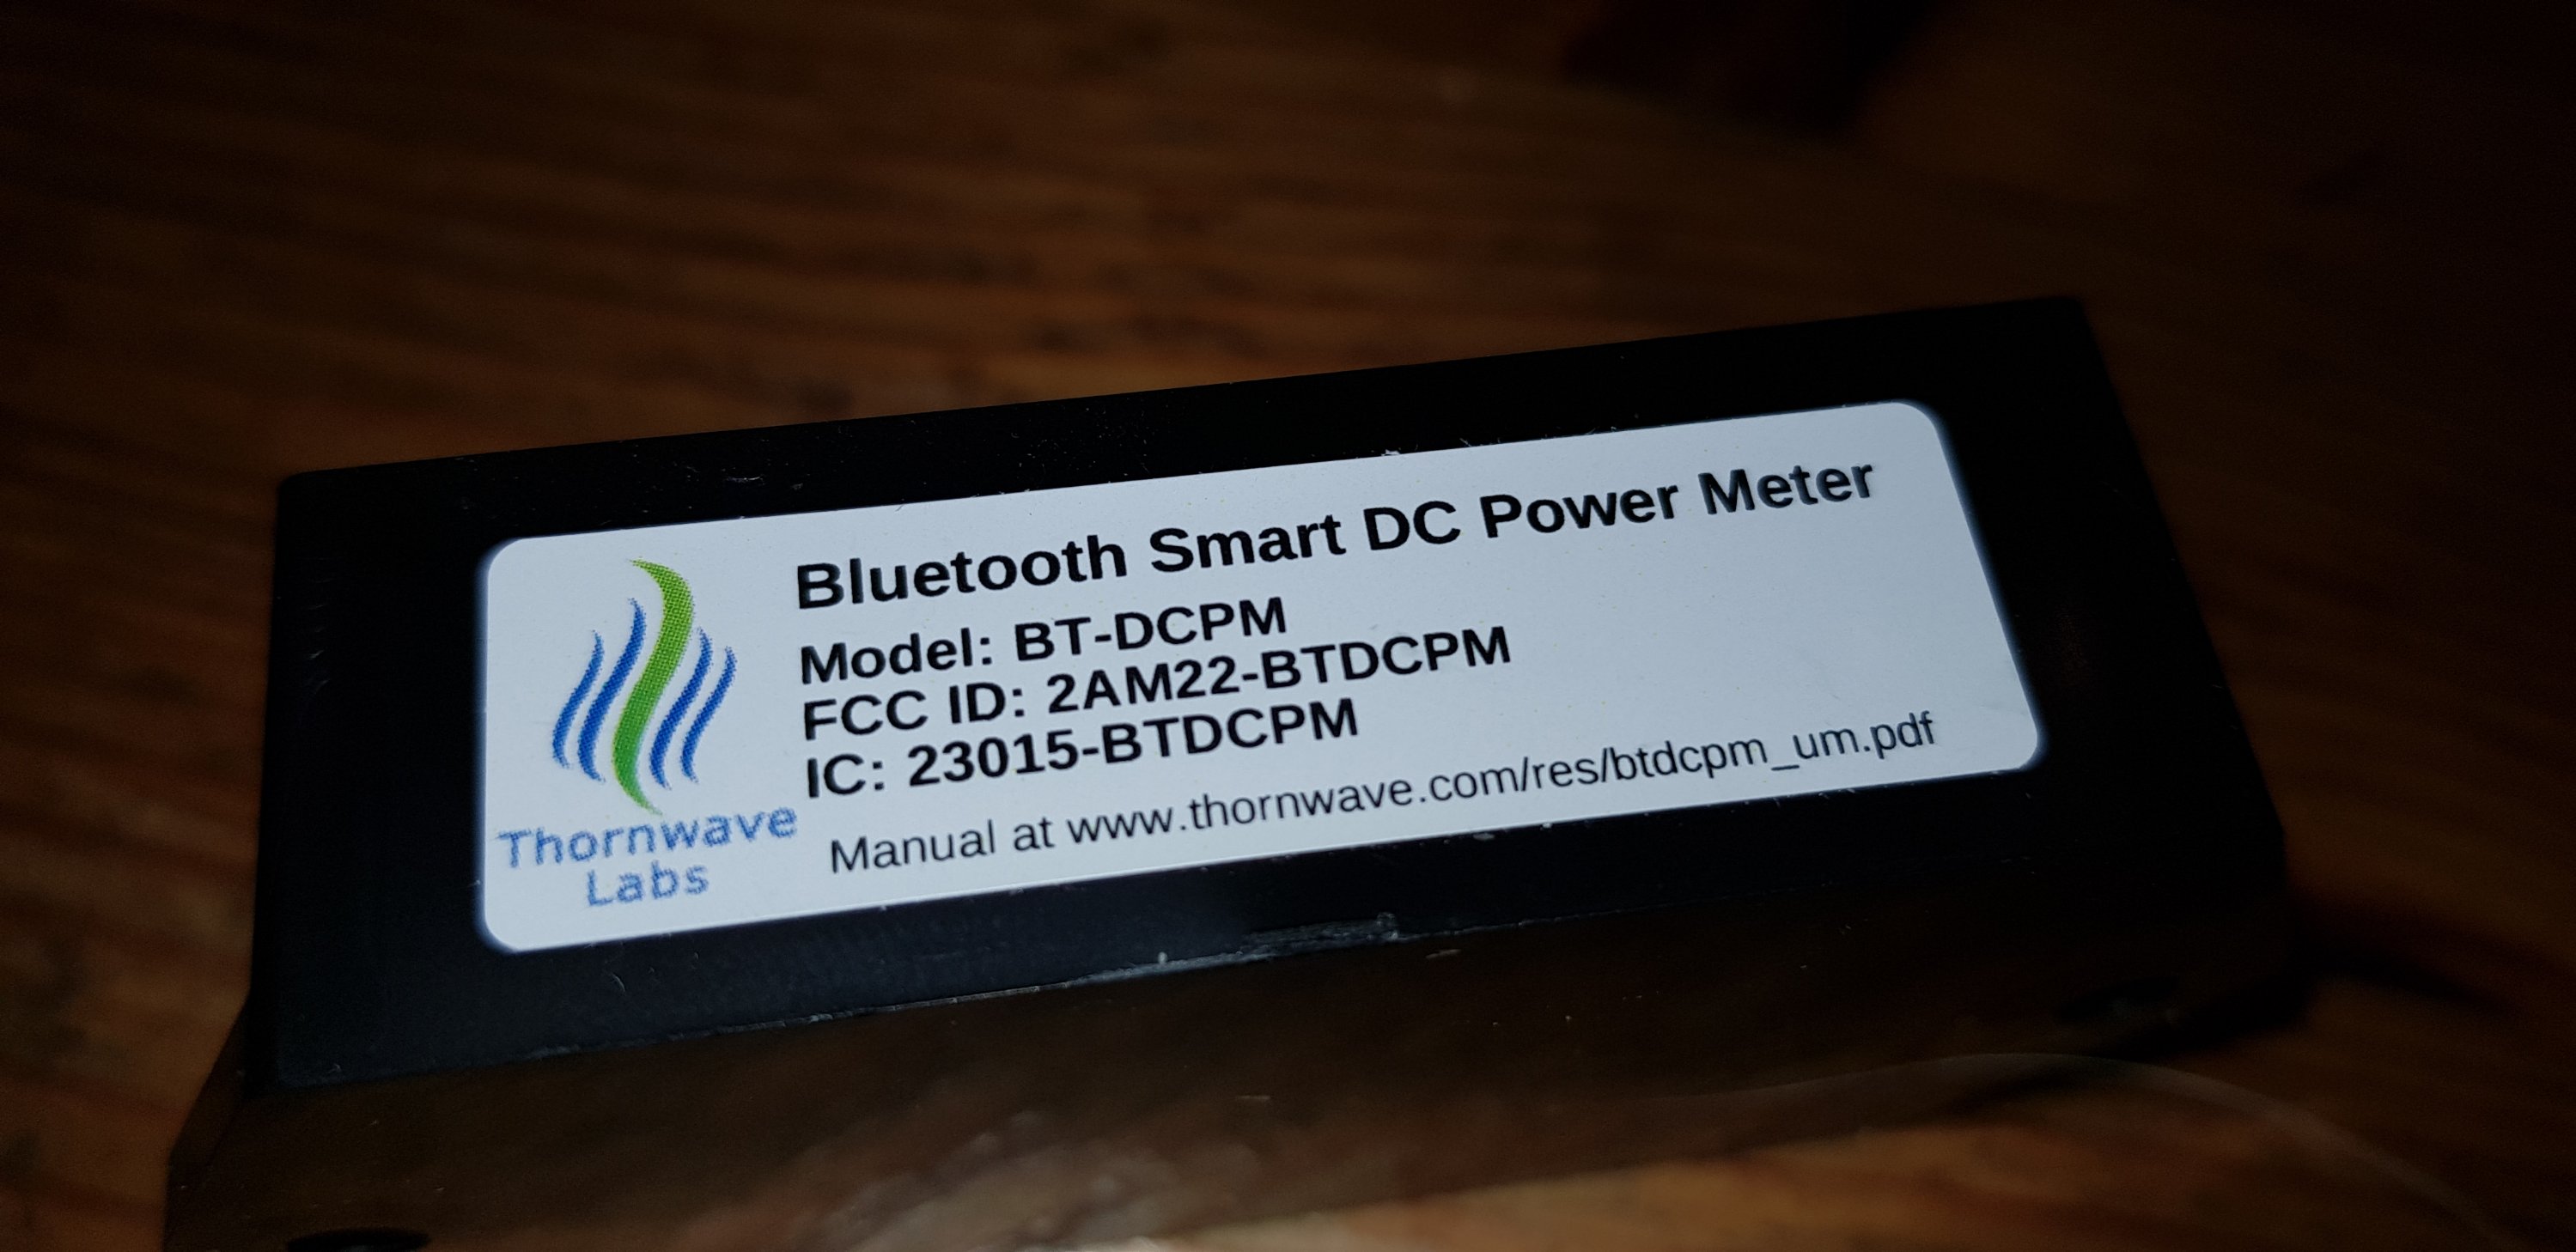

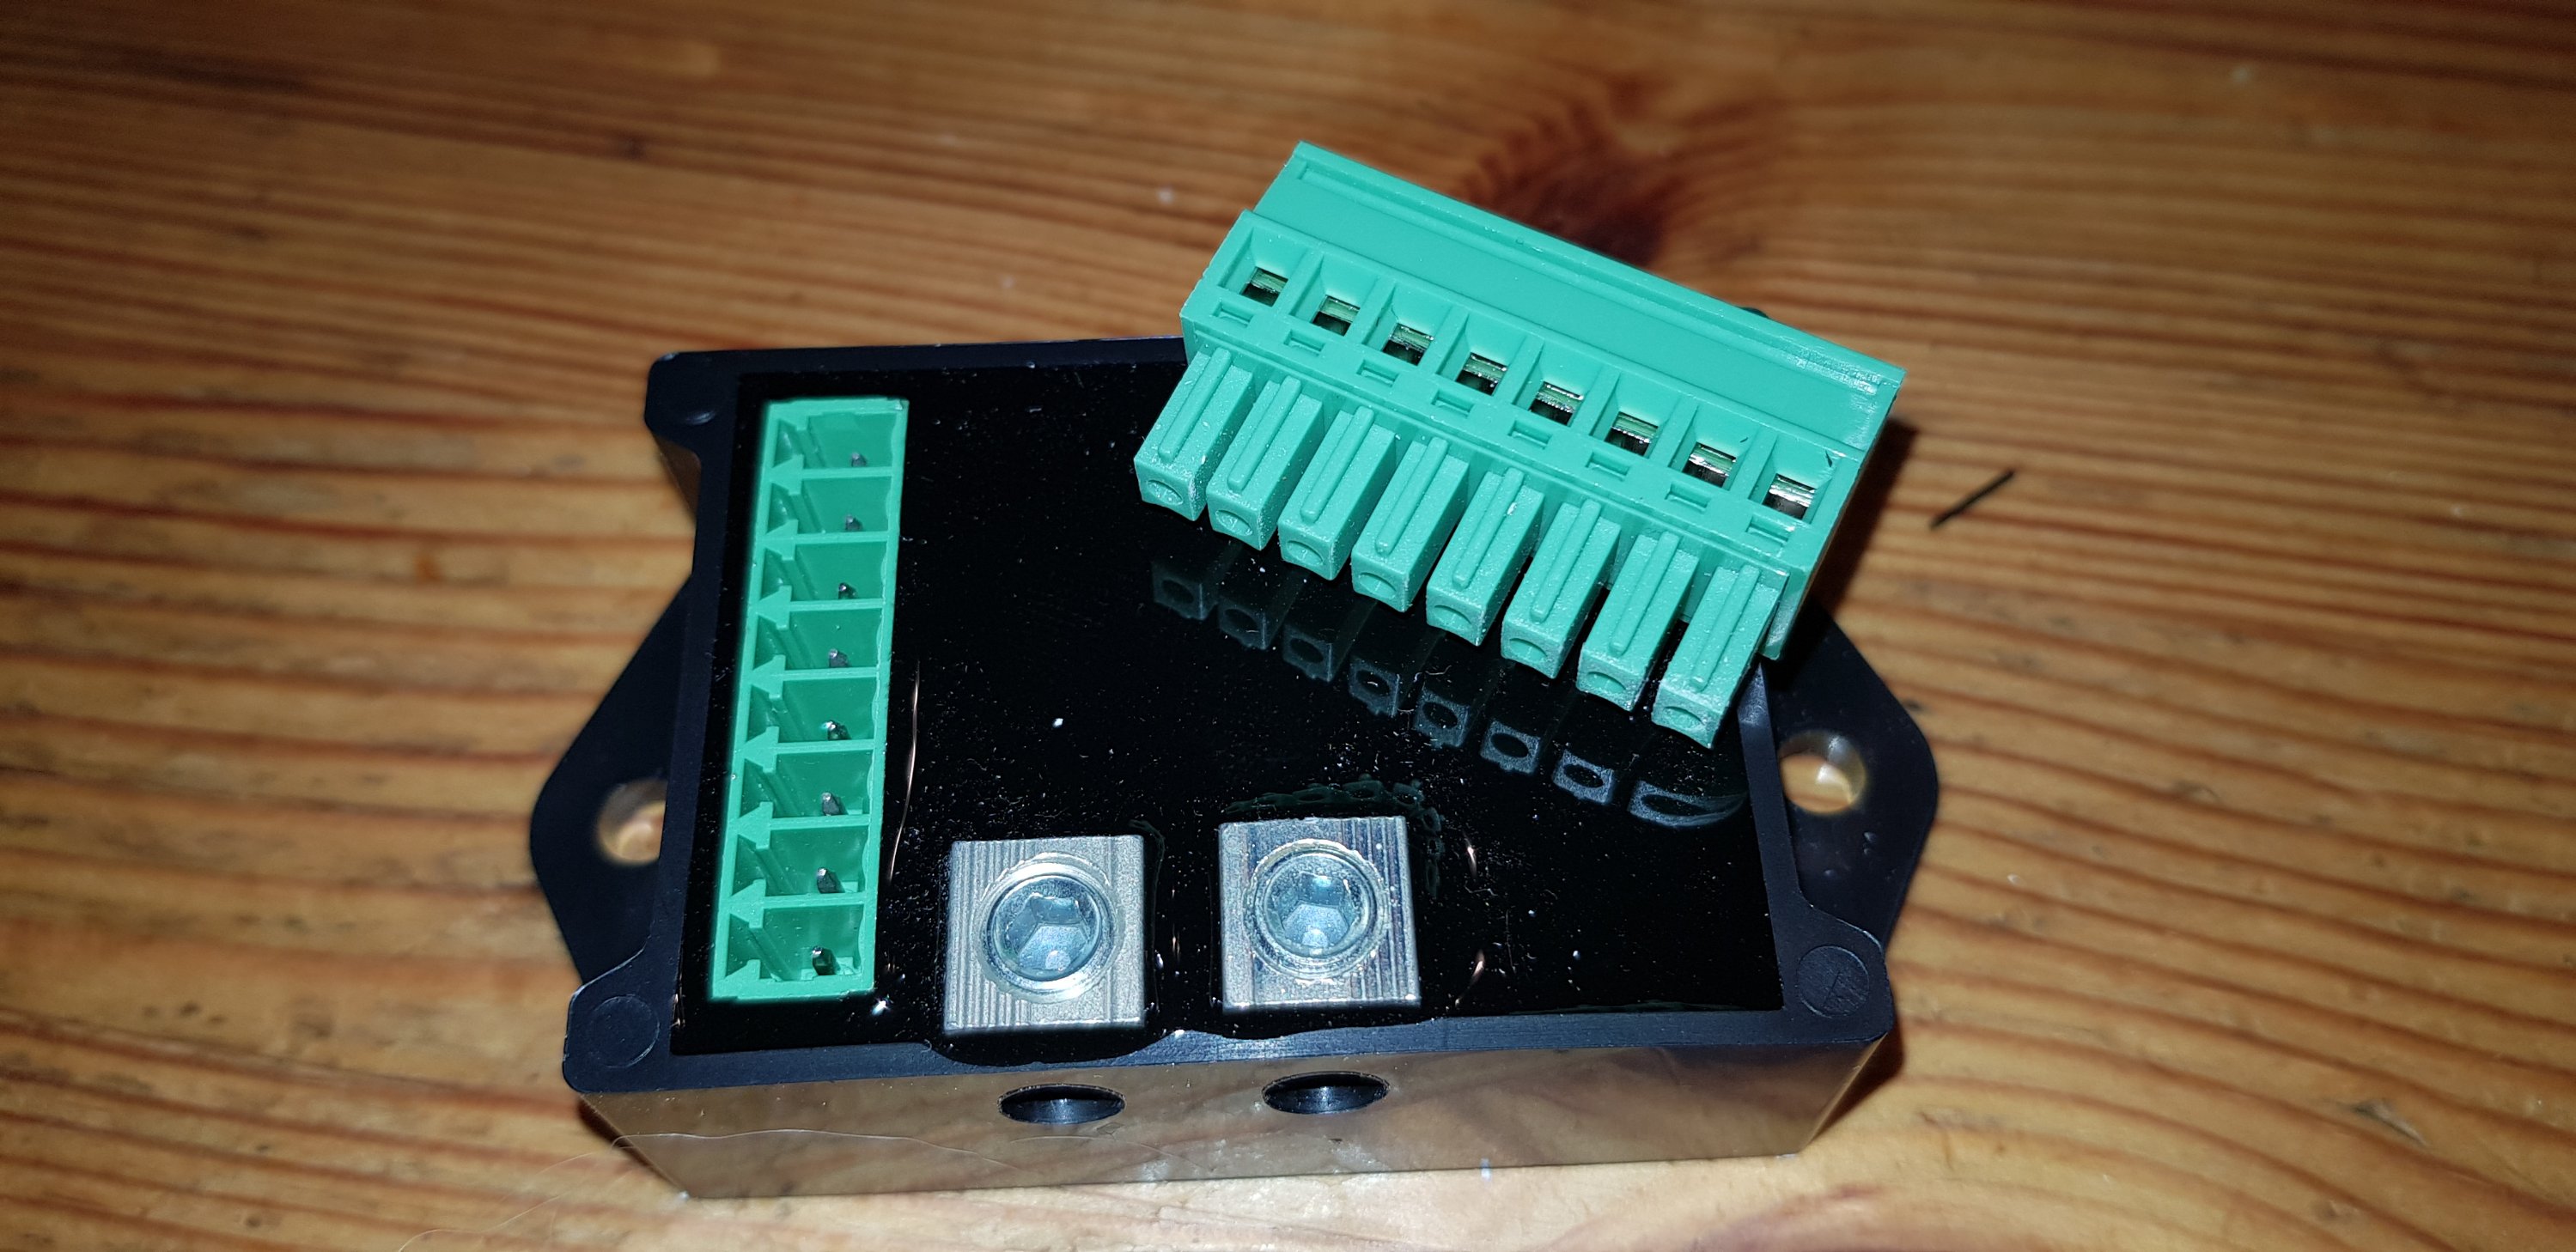
This build will use a Bluetooth current shunt from thornwave.
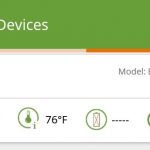
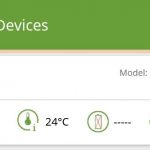
Managing internal temperature
One of the issues we have when we use lithium-based batteries is charging in extreme temperatures. here at 65°N, that extreme is usually the cold. One of the interesting features the shunt has, which I haven’t seen in the any commercial solar generator, is the temperature sensor. The sensor allows us to remotely check the internal temperature of the enclosure. Since our lithium iron phosphate batteries have a spec regarding low temperature charging, we can always be certain the internal temperature of the system, is within that spec when charging.

Read more about the thornwave PowerMon
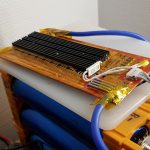
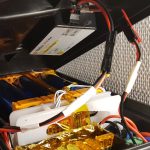
Headway 40152S LiFePO4 Cells
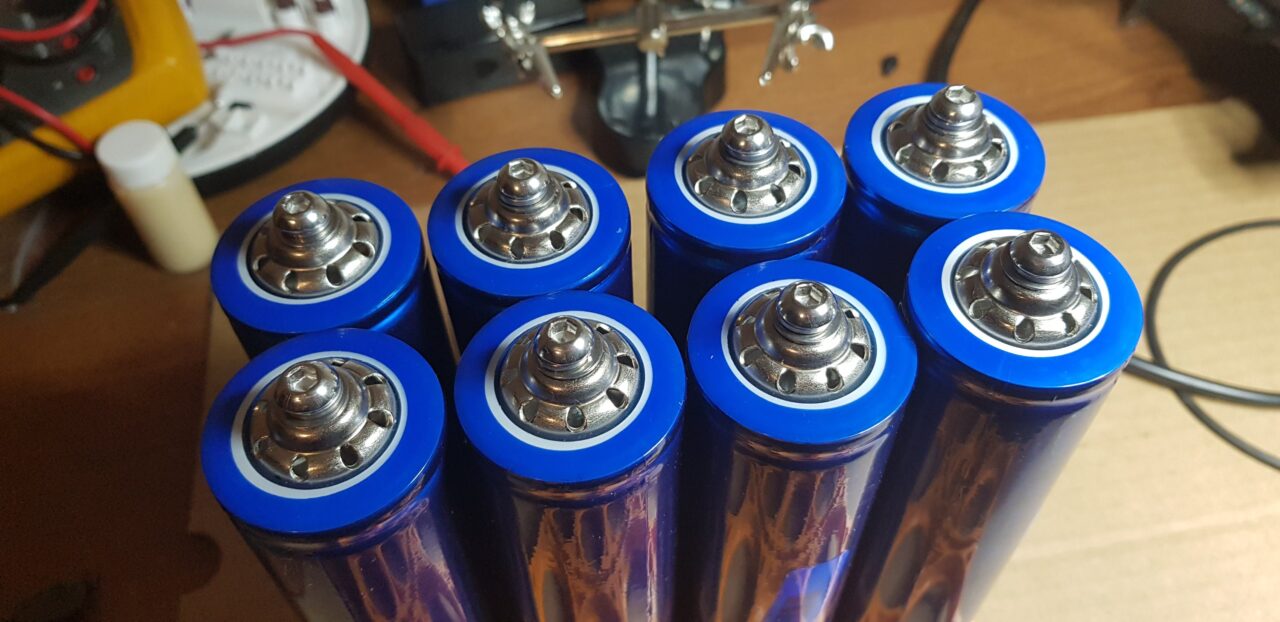
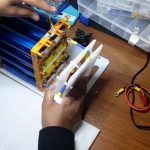

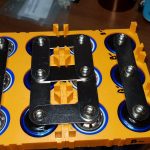


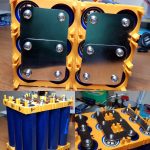

The project uses 12x Headway 40152S 15Ah 10C LiFePO4 Cylindrical Cells, with screws. They will be configured 4S3P for a theoretical maximum current output 450 amps 3x 150A. Thankfully it’s not the current output which we are after it’s the capacity which is most interesting. 4S3P yields us ~576wh Specification:
- Nominal Voltage: 3.2Volts.
- Dimension:40±1mm X 165±1mm (with screw)
- Capacity: >15Ah.
- Maximal Charge Current: 3C (45Amps).
- Max Continuous Discharge C-Rate: 10C (150Amps).
- Maximal Discharge C-Rate: 15C(225Amps).
- Max voltage: 3.65±0.05Volts.
- Min. Voltage: 2.0Volts.
- Lifecycle: 2000 Cycles.
- Weight: 480Grams.
- Impedance: ≤8mΩ.
- Chemistry: LiFePO4.
Charging LPF cells
One question coming in was about float charging LPF cells. First of all these are not lead acid batteries, hence they don’t require float charging. The cells require constant voltage constant current charging. At home and in the field, I’m using Genasun Charge controllers at 14.2 volts with equipment connected. In the perfect world I wouldn’t charge above 14 volts to prolong the service life of my cells. Even at 14.2 volts we’re still going to get ~2k Cycles out of these cells. We can certainly extend the life of these cells far beyond two thousand Cycles by reducing that number to something between 13.6 and 14 volts. this is definitely practical, but requires a custom voltage to be in used on the charge controller. Genasun supplies custom voltages with their controllers. Other manufacturers like Victron have programmable charge controllers. In the end, the voltages and configuration is entirely a user choice. We can spend lots of time overthinking our configurations, but at some point we need to get out in the field and use them.
BMS: Battery management
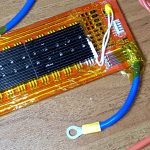
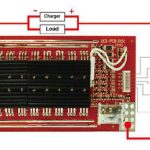
As with all my builds, the BMS is the heart of the storage system. In lithium based systems, the BMS takes care of:
- balancing the cells,
- provides short circuit protection,
- over voltage protection,
- under voltage protection
This is the same BMS we used in the 10ah Headway LiFePO4 build, so we have more than a year of trouble free, rock solid experience with it in the field. We are also lucky the a ham radio operator in the USA supporting this project. He has sourcesmd the boards from the manufacturer, making it easier to optain the board for builders- This supports the project, but also provides a trouble free source for the boards at a reasonable price.here’s another article I wrote regarding BMS boards in our Solar Generator projects.
Balancing with genasun charge controllers.
There was a question about the compatibility of the BMS with Genasun Charge controllers. Tge spec of rhe BMS notes balancing starrs at 14.6 vokrs. This is why bioenno power sells 14.6 volt chargers with their LPF packs. Most BMS boards start balancing on full charge. The thing is, we really don’t want to. Charge our batteries very often. The goal is to charge them to from 90 to 95% of full, to prolong their service life. Genasun charge controllers don’t charge to 100% because they are being gentle with your battery, and prolonging their life. now depending on how the BMS is configured, this might not behind the voltage to trigger the balancing functionality on the BMS. in my experience, this BMS and Genasun controllers have been compatible, and the sales in our packs have maintained their balance. The caveat is, with a heavy load on the system, the system will never reach high enough voltage to start balancing. but that doesn’t mean we should worry. when we put our packs together, we should do the initial balance. even without the BMS the balance is going to stay pretty close for quite some time. now the good news is, with this combination, balancing will start when the system sits idle without a load, but connected to solar power and being charged. the role of the BMS. There seems to be some misconception about Balancing and when balancing takes place. If we pre-balanced and charged the cells, they’re already good to go. at that point, the only job the BMS does, is correct subtle differences in balance between the cells. The cells don’t randomly jump out of balance for no reason. So balancing is rarely required anyway. this is why people bottom balance, but that’s a personal choice.The 10 amp hour version of the Headway build uses the same BMS. I check those cells a few times per year or every few months. At no point have I found the cells to be out of balance. That build also used the Bestech/Genasun combination. I’ll post Instagram videos from time to time where I test the voltage’s of the cells to show the balance.The board is available from ebay and delivered from the United States, with free shipping.Bestech BMS – Worldwide ebay listinghttps://youtu.be/HijXQRSBBto
Solar Power
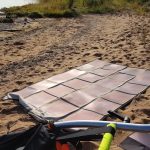
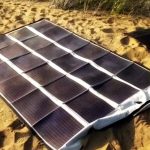
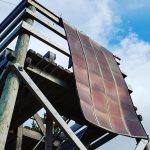
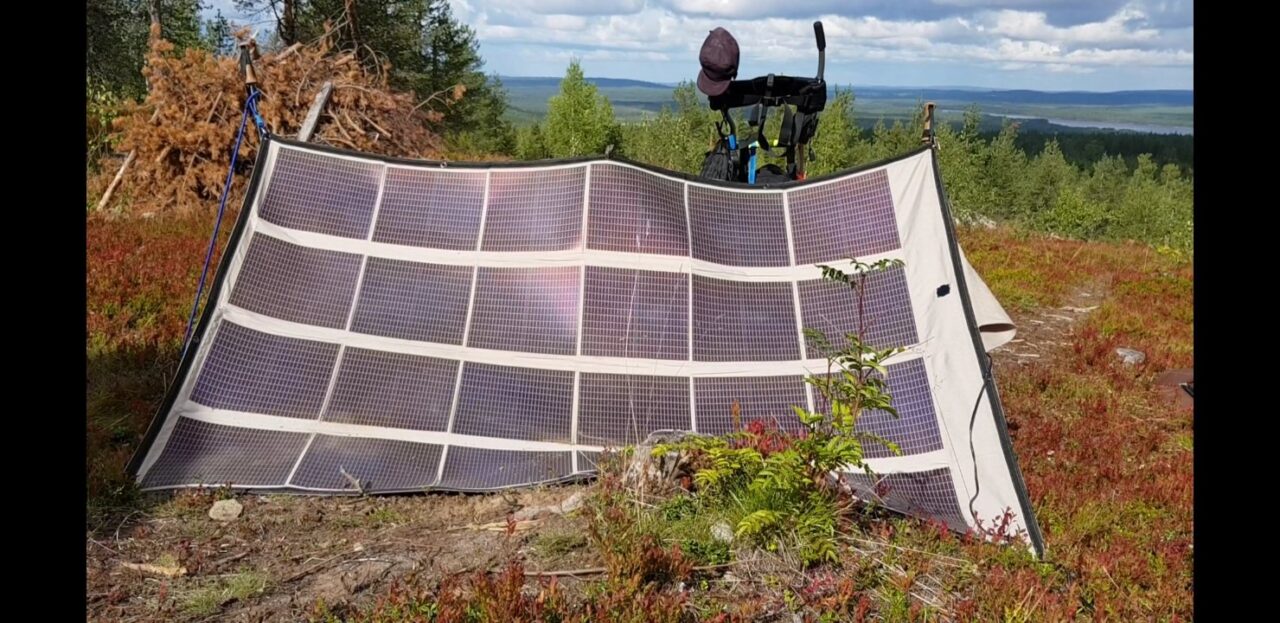 My DIY Solar gen will use the PowerFilm FM16-7200. It’s 120 watt thinfilm, flexible solar panel. The thing that makes it different from most other portable solar panels is being backpack portable. I understand the cost of this panel puts many potential buyers off. Feel free to substitute this panel with whatever panel fitting your budget and needs.Check out off frid solar gear option on AmazonIt’s important to plan the solar panel in addition to the solar generator. Often in a grid down scenario, people rely on charging the solar generator with AC power, thinking the solar generator will be ready when they need it. It will be, for the few hours it lasts. Certainly a solar generator can act as battery backup during power outages, but the reality can be a little different, if the power outage last longer than the capacity of your solar generator. Food for thought.https://youtu.be/JWS2fk3jZq4
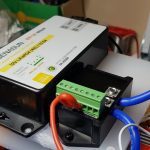
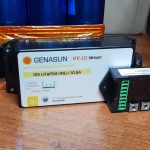
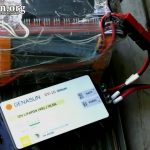
Genasun Charge controller
 For this project, I’m using the Genasun GV-10L charge controller for this build. It’s designed specifically for lithium iron phosphate batteries in 4S configuration. It’s also RF quiet for our HF Communications.I’m also considering the victron charge controller since they are programmable and also quiet. I have one incoming, but I think we’re going to use that one in a project with a larger solar array.
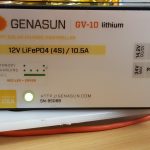

Please read my article on Genasun Charge controllers for diy battery projectshttps://youtu.be/AYq32LmO_nw
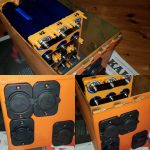
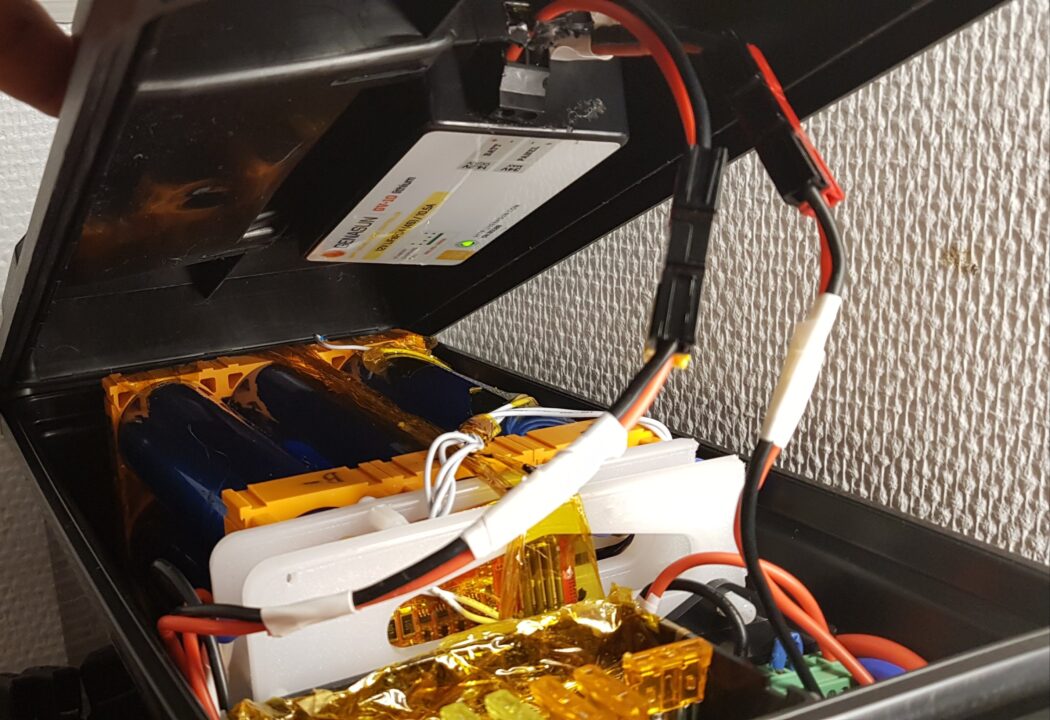
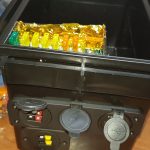
Enclosure
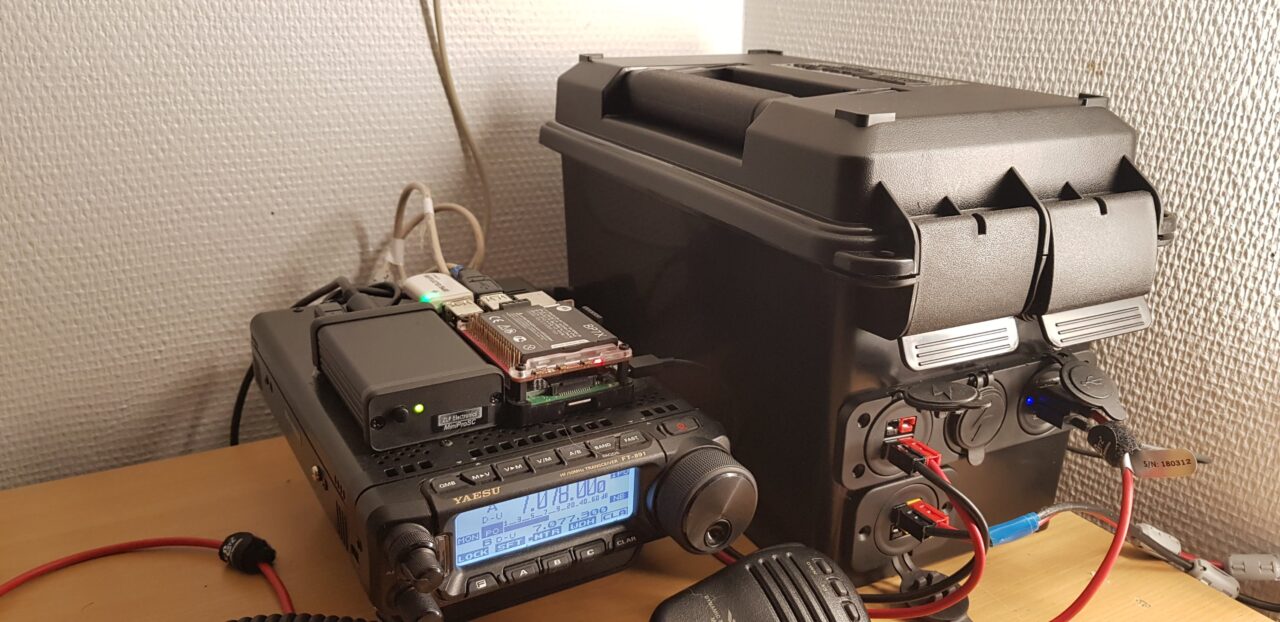 The DIY solar generator is mounted inside an MTM Enclosure. It’s a cheap ammo can style box from Amazon and eBayHere are the links
- Amazon
- EBay TBD
I really had my heart set on an ammo can style box. I don’t have the top loading ammo can style Pelican case, and can’t justify the cost when I have these just sitting here.EDIT: in the end I found a plastic ammo can style box from Amazon. It’s much easier to work with than the metal ammo can, without the short circuit possibilities.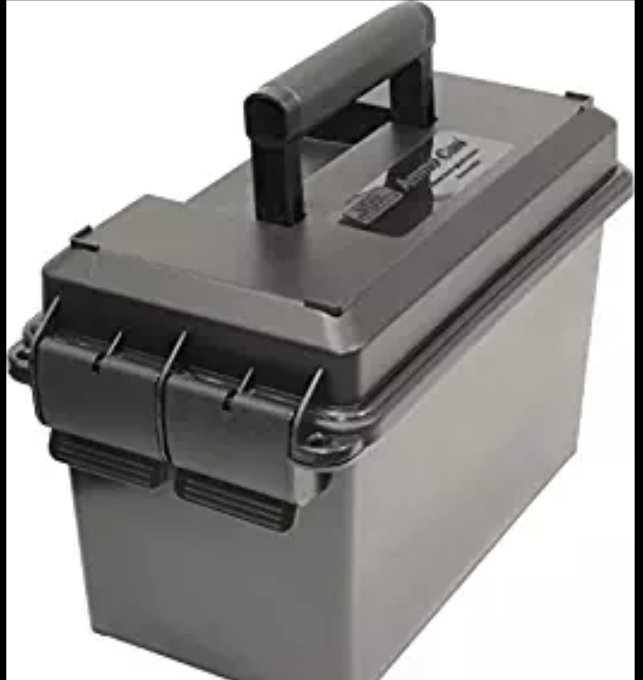
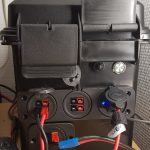
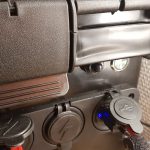
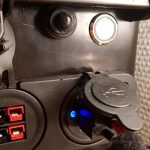
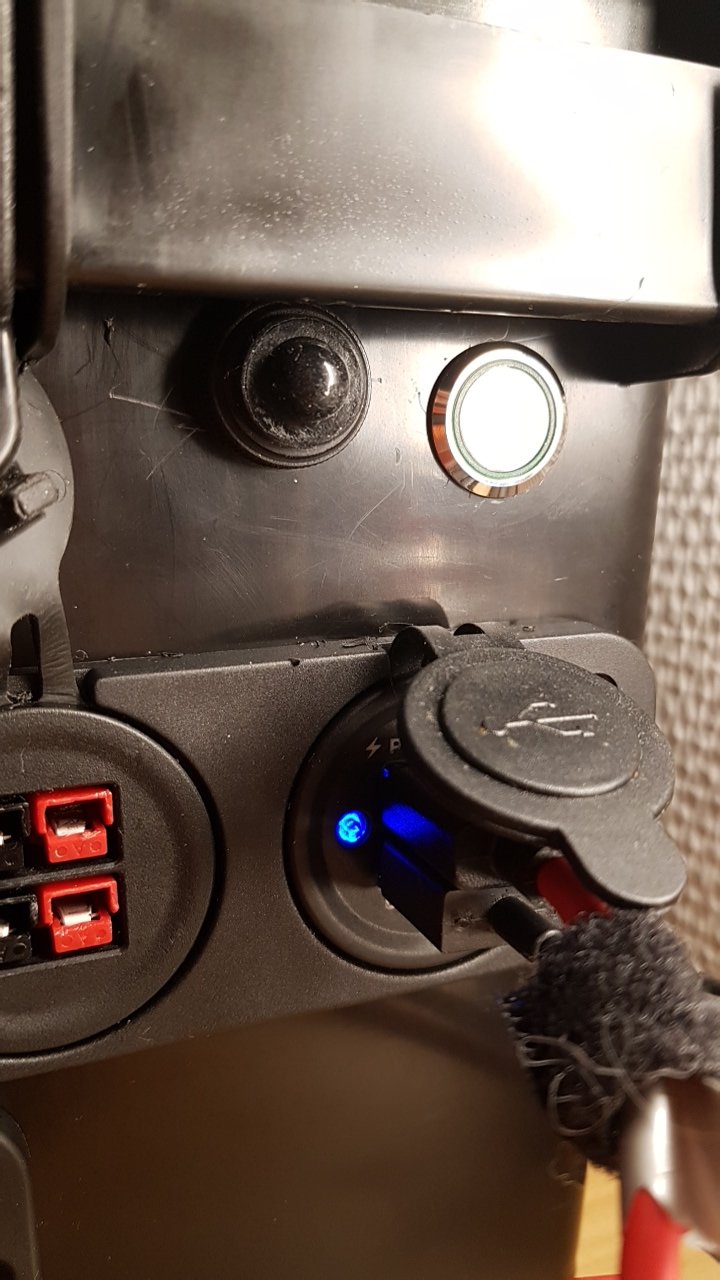
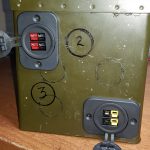
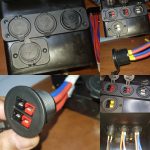
DC I/O
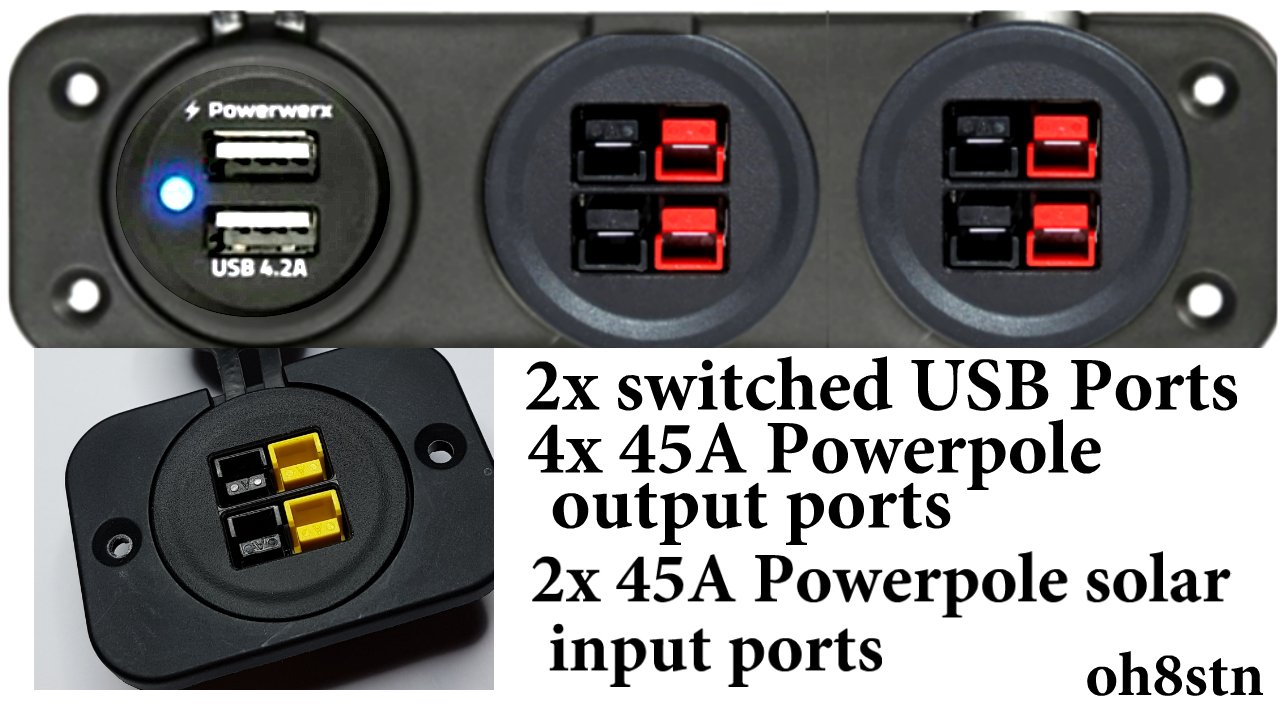 I decided on the following DC inputs and outputs.
- 2x switched USB ports
- 4x 30A Powerpole ports for DC out.
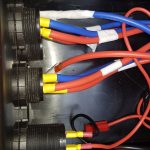
- 2x parallel Powerpole inputs for two solar panels.
– Powerwerx USB panel mount on ebay
– Powerwerx 2x Powerpole
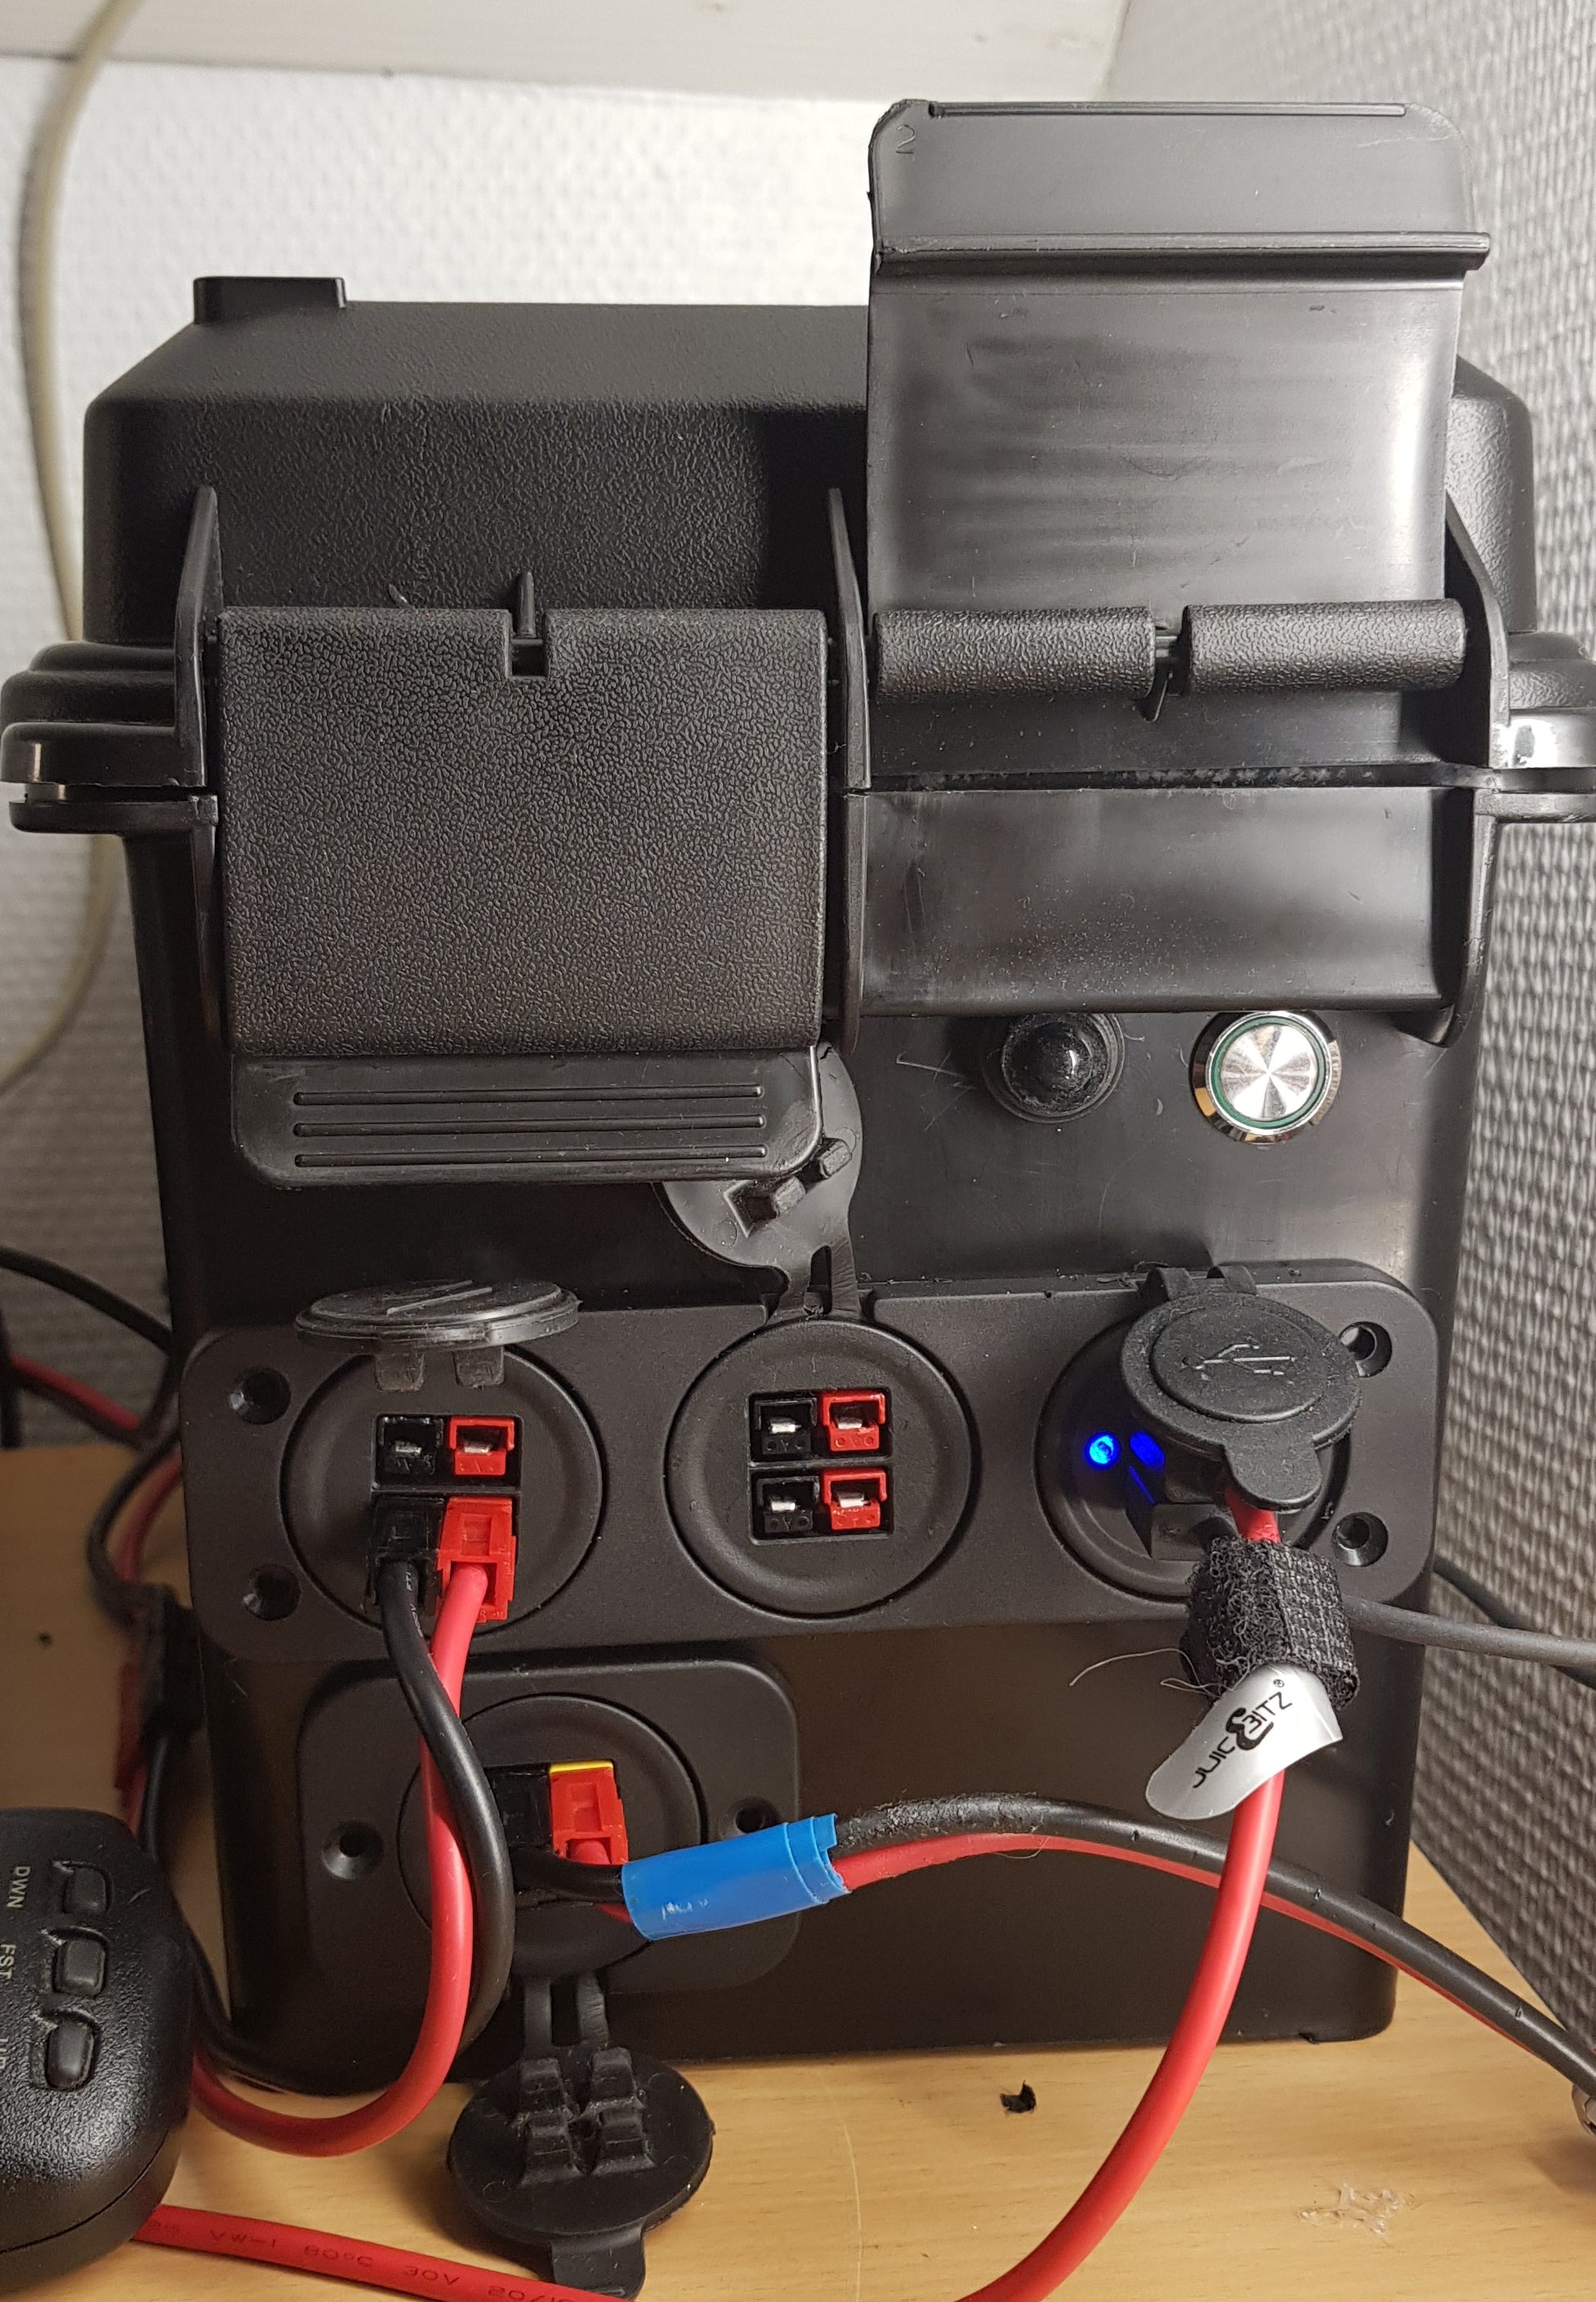
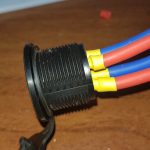
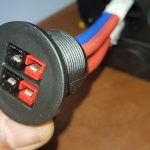
For solar inputs I’m using yellow housings positive, black negative on the powerpole ports. DC outputs traditional black negative, red positive. The idea is the sun is yellow, so the yellow input differentiates the DC outputs.
Cutting the enclosure holes
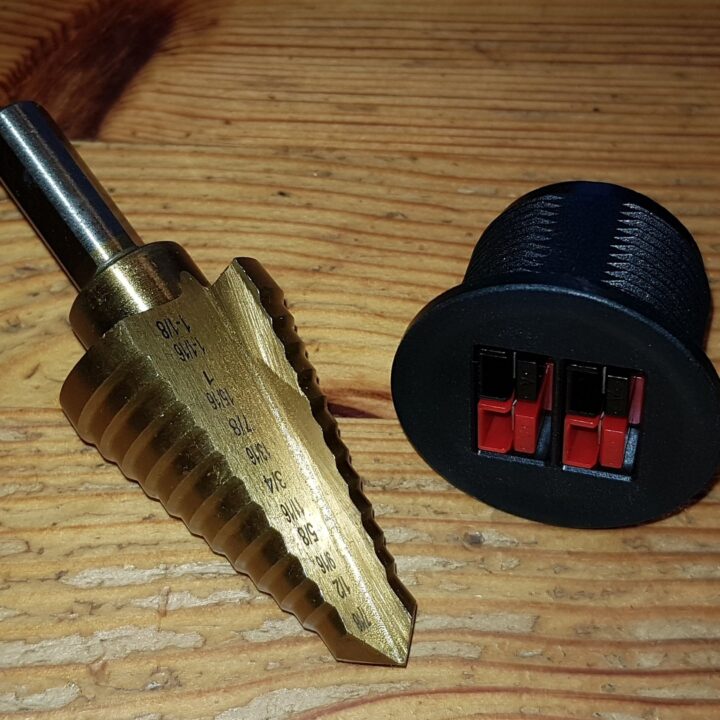
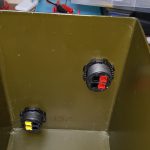

I used a titanium 28-29mm (1-1/8) step bit for the Panelpod holes. It’s important to do a mock-up of all the components Inside the Box, before drilling the holes. the mock-up doesn’t have to be perfect, but it should give you an idea of what goes where, and how it’s going to fit.There’s more info coming.
DC Power distribution
For this project I believe there are two practical options for DC power distribution. The first is from k9jeb.com
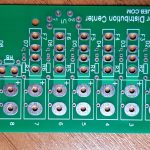


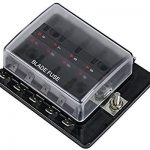
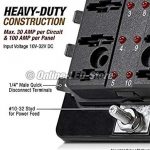
The k9jeb power distribution center is courtesy of K9JEB. He makes and sells these boards on his website to create a sort of DIY powerpole distribution board. I like these in the shack, but I haven’t been very happy with them when working portable.The issue I had while portable, was the upward facing connectors, but that certainly isn’t the problem in this project. With that said, the circuit board is a magnificent solution for creating a power distribution center inside the enclosure of the DIY solar generator. So this power distribution center will create order, where there would have been an incredible mess of wires. It will also act as a fuse block and blown fuse indicator, making troubleshooting incredibly simple.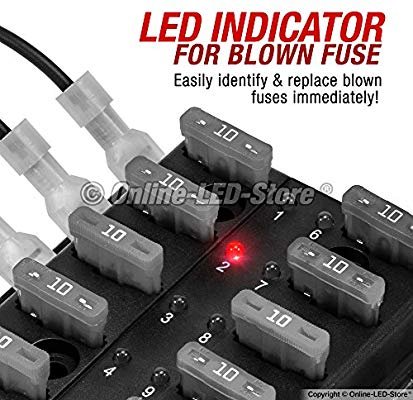 There’s also a second choice. We could use a normal Automotive fuse block as an alternative to the powerpole. distribution board. the main reason anyone would want to use the automotive fuse block, is the 100 amp rating. for example if we’re using an inverter in the system, to drive a high power AC device, we would need more current than the powerpole distribution board supporrs.Here’s the Amazon link for the fuse block.

Background
Portable 12 volt power is critical to operators in the shack, and in the field. Grid tied life is pretty easy for the ham Shack, since we generally have stable AC mains power coming in. In the field we have often used small lightweight battery packs to power our HF Radios, for a few hours at a time during field day, SOTA, POTA, … When we are faced with Grid Down emergencies, brown outs, black outs, portable emergency power becomes much more complicated. Not only do we need to ration the power we have, we also need to come up with ways of recharging our battery storage, when depleted. Some operators use combustion generators, some power communications gear from their vehicles. others deploy solar generators for emergency power, when it is most practical to do so. How will you do it?
Design goals
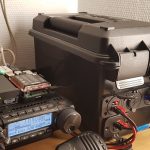
This is my concept for a man/woman portable, 576 watt hour 12 volt solar generator, to power our ham shack or field stations, along with lighting and other essential devices for a maximum of 24 hours before ever pluging in a solar panel.This DIY Solar Generator concept could be applied to a variety of home or field communications scenarios, where grid power is unstable, lost or simply not available. Most importantly, this concept could be applied as an Emergency Communications Go Box “Power Module”, providing clean efficient power for extended off grid communications.
- More than 1/2 KWh of useable battery storage
- 24 hours of runtime for the field station.
- Dual USB ports
- Less than 10kg or 22lbs
- Multiple Powerpole ports
- MPPT charge controller
- Relay controlled main power.
- Integrated with my mobile phone
- Open interface for battery stats and data logging
- …
Previous builds
https://www.youtube.com/playlist?list=PLKMrdrsNkFA43q0POuXM-5-49yOd3t4CP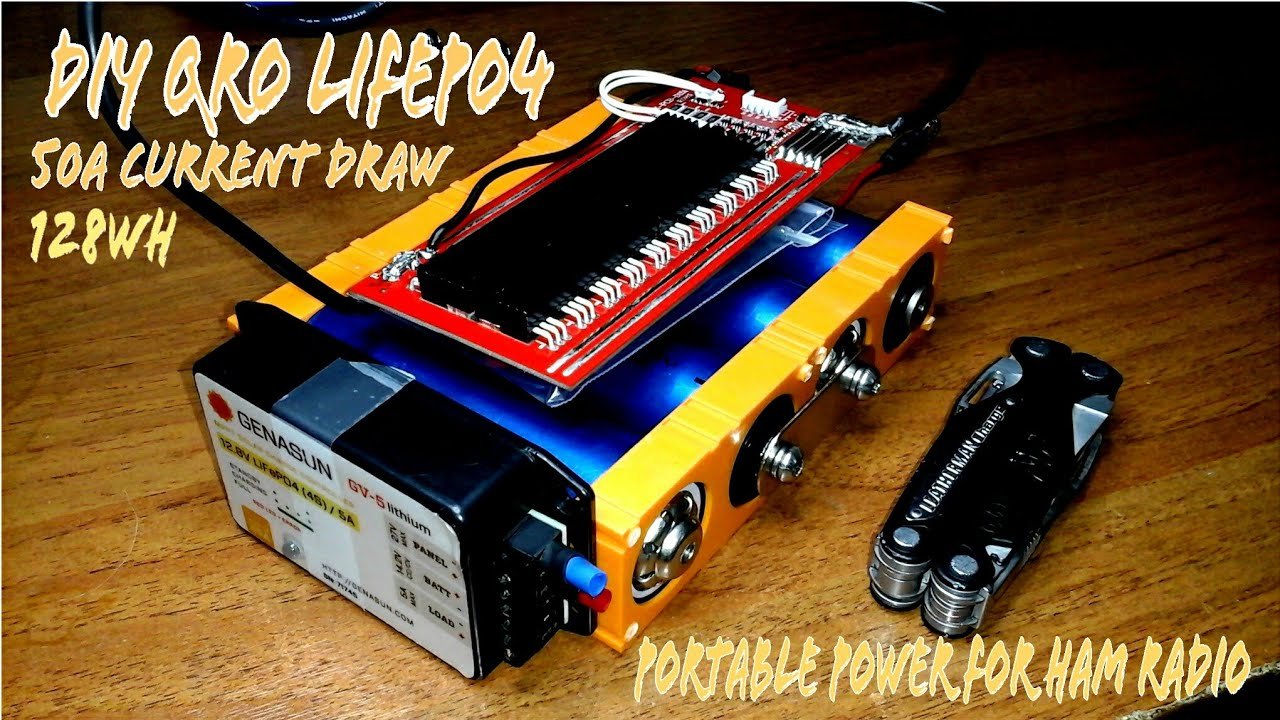 The 128wh Headway battery builds were the testbed for a larger Headway based builds to come. Before doing a larger build, we needed to understand:
- How to work with those cells,
- How robust they were.
- How many amps we could pull from them,
- and how safe they would be to work with,
These were all critical steps in the process.When the 10ah builds were completed, many operators wanted to continue forward, turning the Headway packs into a full battery box. Many others wanted to take it to the next level, turning it into a complete micro-solar generator (it is a solar generator 😉). Others wanted to understand how to increase the capacity of these packs with parallel sets of batteries…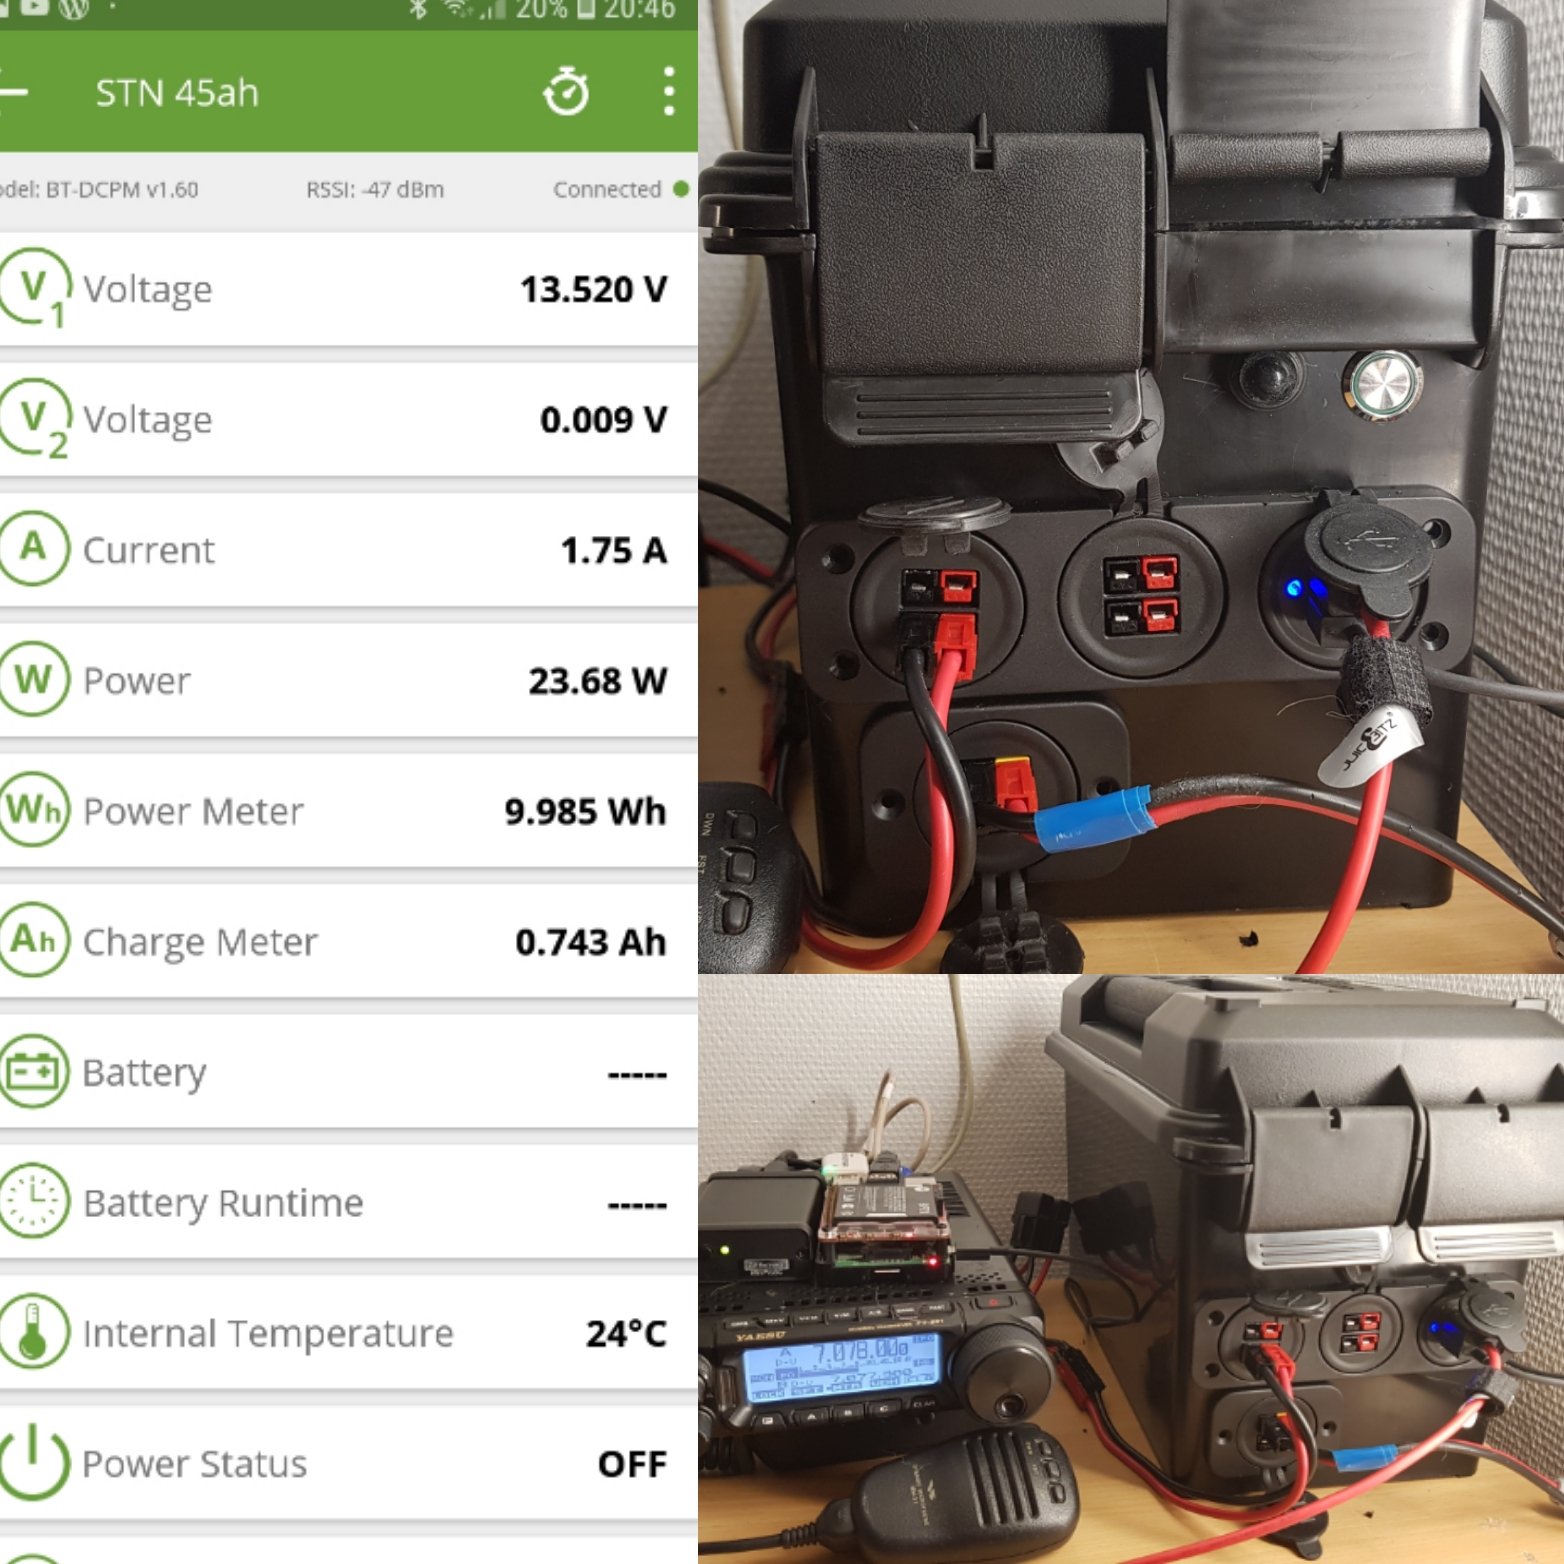 Well I agreed, but the channel had little in the kitty to start building right away. That’s not a bad thing, since we needed some experience on the 10ah Headway pack anyway. So after a few popular videos, blog posts, and help from PayPal, Patreon, and supporters who share the videos and blogs, getting the message out there, the components started coming in.
 In total I’ve spent about two months researching, developing, documenting, this project.If this information has been useful to you, please drop a buck in the tip-jar, or share this project on social media, your blog, or in your favourite forum.
X Days Off Grid
 ANYWAY, I’m hoping with what we’ve learned from the 10 amp hour Headway builds, and the x days off grid series, we can put our heads together as a community. This way, we can combine our skills and experience, to build a better (more practical) solar generator for the emergency communications, field communications and grid down preparedness communities.Amongst other things, the X days off grid series was designed to measure energy requirements for the field station, where only batteries and solar power were available as an energy resource. We always knew we were going to build a larger solar generator, but needed field experience before doing so. Having much of that experience in hand, we start the next steps in portable power, moving closer to a fully self-contained Field Station, completely autonomous from grid power.If you’re new to my channel or blog and want to catch up, here are all the battery and solar power videos up to date. Portable Battery & Solar Power for Off Grid Communications:
Popular topic
Solar generators and portable off-grid or grid down emergency power are popular topics on YouTube these days. Canadian prepper is doing the Inergy Kodiak videos, Jehu has done a DIY Inergy Kodiak, and there are even more videos and tutorials out there, some good, most bad. One thing each and every one of them is lacking, is that connection to how it’s going to be used in the field. It’s fine for someone to stand in front of a camera from their living room, telling us how good something is, but it’s not enough. Without showing a field deployment with a Solar generator in the real world, in a real or simulated grid down scenario, the videos would lack some much needed credibility. There’s also another issue. In emergency communications and grid down preparedness, there’s a certain expectation that one is able to repair their own gear. What happens if that Goal Zero Yeti or Inergy Kodiak has an component failure? What happens if there is a failure inside your Bioenno Power 120 or M400 battery pack? Could you repair it? Certainly buying something off the shelf can save valuable time and resources, but it leaves us vulnerable if for some reason, the device fails. Building your own solar generator means you understand each component in the system, how to troubleshoot, and naturally how to repair it
Notes on other designs
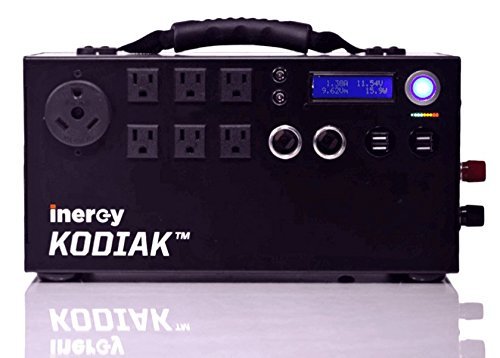 The Inergy Kodiak is awesome, but it is also unnecessarily expensive. We can forgive it because much of the cost is tied up in storage capacity. Unfortunately it’s still tries to be all things for all people. For example, these six AC Outlets and the internal inverter used to power them. That all helps add to the cost of the unit. Realistically, if we change the way we think about what is really required during a grid down scenario, we can agree nobody needs 6 AC outlets. If someone says they do, they’re not really planning for a minimal off grid footprint. The Kodiak also has the cigarette lighter ports instead of real ports (coaxial xt60, xt90, …) to get DC power out of its batterystorage. So it’s primary design goal is getting AC power, out of the system. Even with an efficient pure sinewave inverter, it seems awfully wasteful. The inverter may be efficient, but converting DC to AC then back to DC to power your device certainly is not.
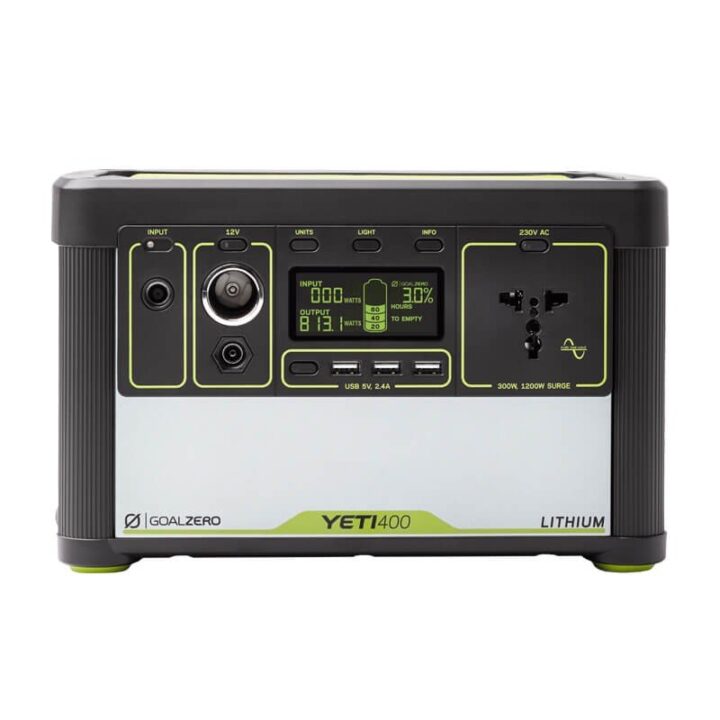 The Goal Zero Yeti 400 also has its own benefits and deficiencies. It has a coaxial output, multiple USB ports, a single AC port, but unlike the Kodiak, all of it ports suffer from low current draw capability. The DC output on the Yeti only supports 10 amps maximum. Seems like a good solution for a blogger on a camping trip but not for real grid down preparedness.
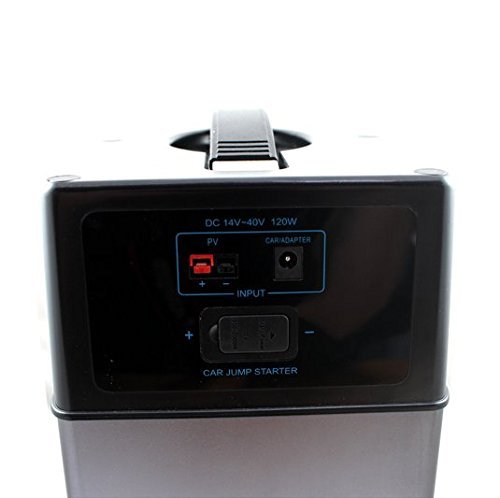 The Bioenno power M400 is a better value than the Goal Zero Yeti, but again tries to be all things to all people. Unfortunately Bioenno Power continues putting its name on rebranded Chinese products, in hopes of us believing there is America made know how behind its design. (I digress) At first look, the DC outputs seem well thought out:
- 1x 12V Marine Car Socket with 10 Amp Maximum Discharge
- 2X 12V 6mm Coaxial Socket,m with 3 Amp Maximum Discharge
- 2X 5V USB Socket with 2.1 Amp Maximum Discharge
- 2x 5V USB Socket with 1.1 Amp Maximum Discharge
- 1X 12V Jump Starter, 200-400 CCA
- 2X 110VAC AC outputs
Where is the 20A port for the QRO radio? Perhaps we are meant to use the jump starter port to power our radios!?It also seems Bioenno power can’t decide if this pack is lithium ion or lithium iron phosphate. The documentation is conflicting.Bottom lineEach of those products offers advantages in a grid down disaster scenario. None of them are bad, but as radio operators, none of them are a good either. Bottom line, It’s not until we design and build our own solar generator, that we can get the capabilities we actually need.
Emergency communications and preparedness
The other batteries built on the channel have been focused on portable Communications. We built those batteries to power the radios, smartphones and computers we use, while operating in the field. As many of you know, the channel has its roots in disaster communications. Lots of bloggers and YouTube channels use buzzwords like grid down, off grid, shtf, disaster, … to increase the potential views on the videos and blog posts they make. Fair enough, but we need to define what we mean by emergency communications and grid down preparedness. This solar generator project can power a 100 watt radio for about as long as you need it, unless you’re at the North Pole during winter, then you’re probably good for about a day. This solar generator is also designed to be an effective power source for grid down disasters such as Puerto Rico in Hurricane Maria. Hurricane Irma, people forced to bug out from the California fires, or any number of disasters we face every year, around the world. It doesn’t matter if we’re trying to power a smartphone or tablet, lights for our camp, or a small refrigerator to keep our food fresh. with a well-designed solar generator we can do all of those things Plus provide portable power for off-grid emergency communications.One thing I often fail to mention of my videos (because I’m focusing on Communications for preparedness, is a solar generator of this type is also good for car camping, temporary off grid power for your boat, RV camping and boondocking. These projects and videos would probably get a lot more exposure, if I could be more generic with production. At the end of the day, I’m a radio operator. That’s where my focus is.In my preparedness planning, the solar generator should power:
- My HF & VHF communications gear
- Emergency lighting
- A DC powered refrigerator (if it’s required)
- Electric kettle (fire preferred)
- Recharging headlamps
- Charging or powering entertainment gear.
One can also see how this DIY solar generator would make an effective battery module for an emergency communications go box. The functionality of this solar generator is limited only by our imaginations.I’ll be creating videos about the DIY solar generator over both YouTube channels and the blog.
https://www.youtube.com/playlist?list=PLKMrdrsNkFA44Jt6vgiC_WIgv-pUYqzGfFinally this post is work in progress, so expect updates as we get closer to the build.
If you’d like to help push this project forward faster, use this link to buy some Powerwerx or Anderson Powerpole gear from ebay: https://goo.gl/5dvGEaIf you found this post useful, entertaining, inspiring, or educational, consider dropping a buck in the tip jar, join my Patreon, or check out my Amazon list.
- PayPal https://www.paypal.me/oh8stn/1usd/
- Patreon http://www.patreon.com/oh8stn
- Amazon http://www.amazon.com/shop/oh8stn
73
Julian oh8stn
